
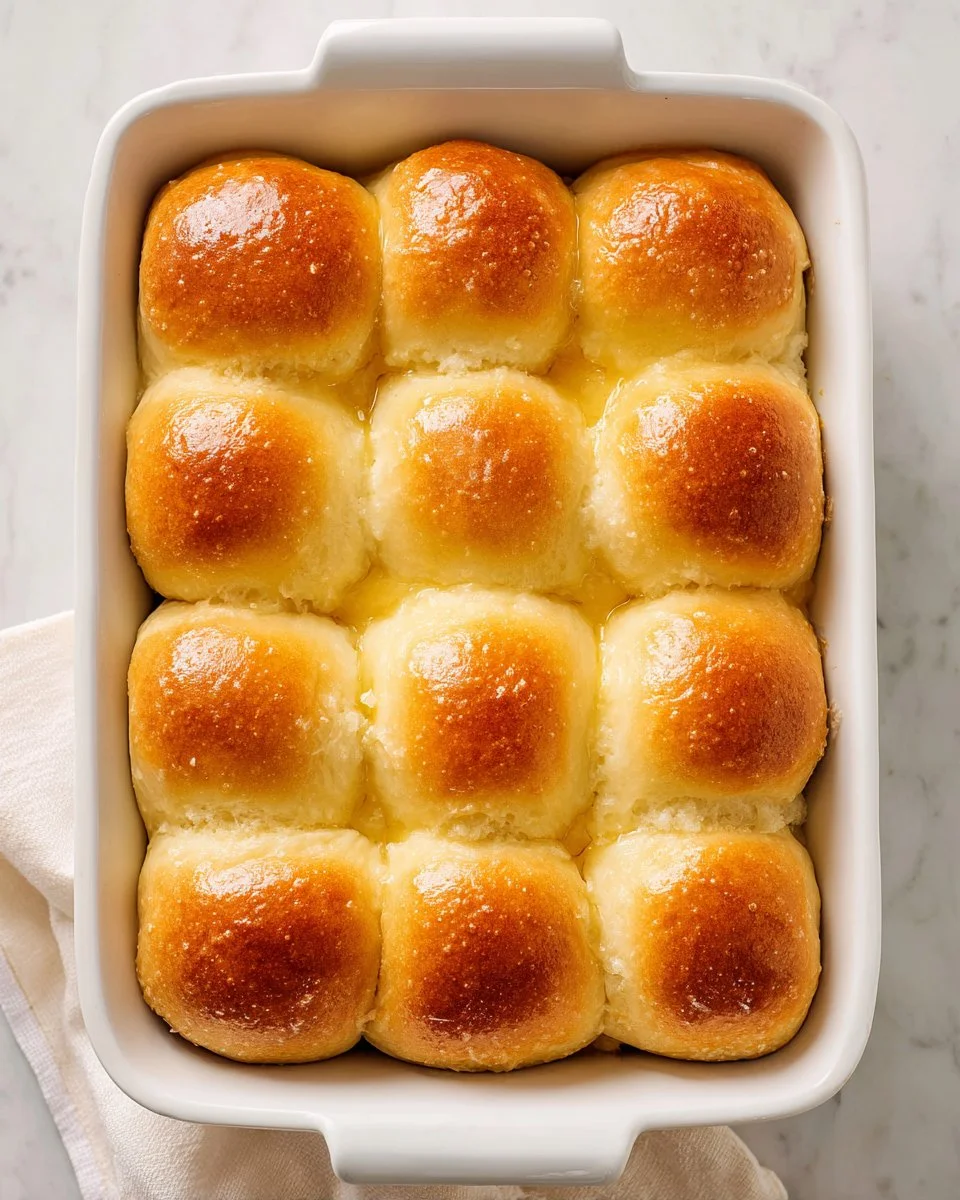
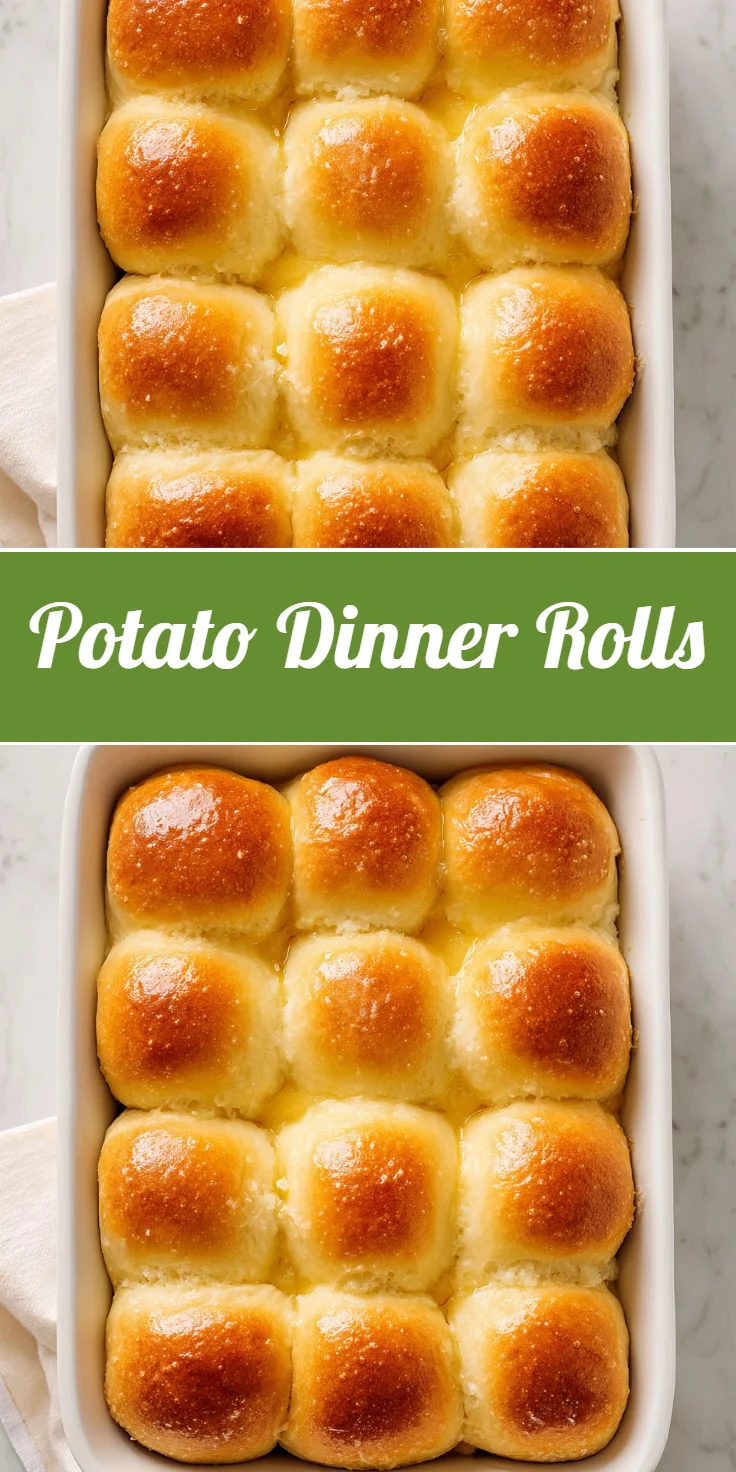
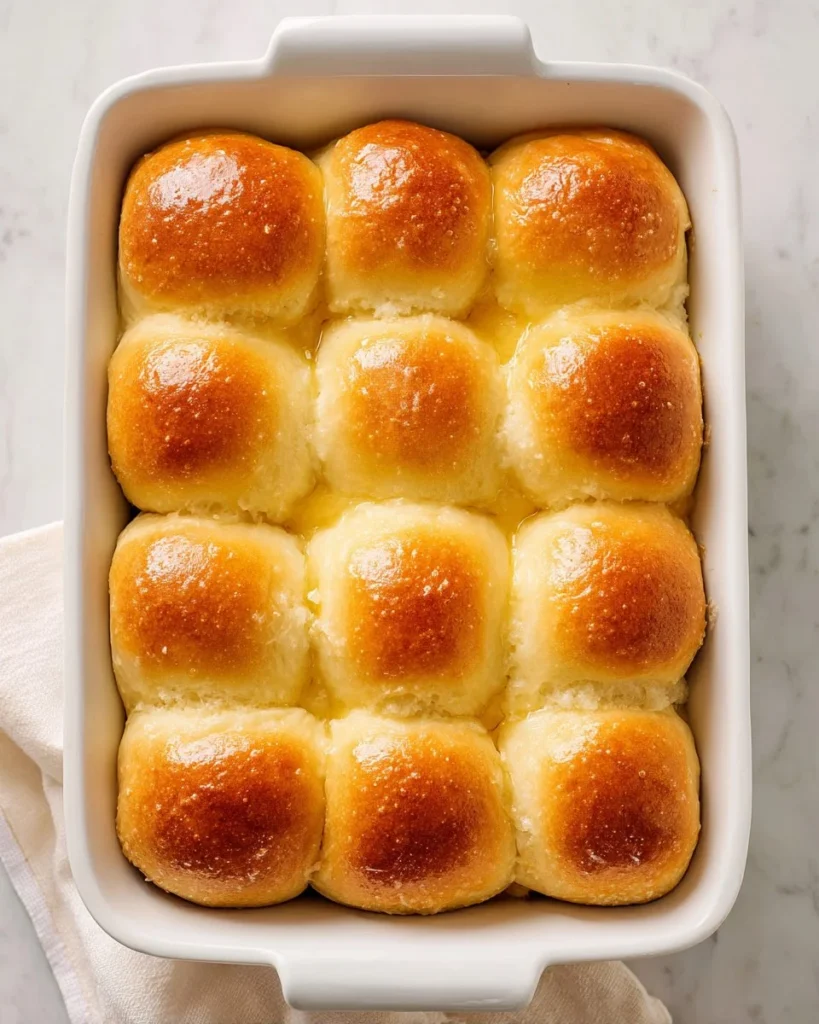
There’s something truly heartwarming about the aroma of freshly baked bread wafting through the kitchen, and when it comes to comfort, few things hit the spot quite like a warm, fluffy roll. These delightful creations are not just any rolls; they are soft and tender, each bite infused with a subtle richness from the addition of mashed potatoes. Perfectly golden on the outside and pillowy on the inside, they invite you to slather them with butter or pair them with your favorite soups and stews. It’s no wonder that these rolls quickly become a beloved staple in family dinners and holiday feasts alike.
Imagine pulling a batch of these golden, buttery rolls from the oven, the crispy exterior giving way to a fluffy interior that beckons to be enjoyed. They are incredibly versatile, enhancing any meal they accompany. If you’re seeking easy dinner ideas that impress but don’t require exhausting culinary skills, this recipe is your go-to. Prepare to enjoy a comforting experience that adds a touch of homeliness to any table setting. Get ready for a delightful culinary adventure that will have your family and friends begging for seconds.
Why You’ll Love This Recipe
This recipe stands out for several reasons, making it a must-try for both novice and experienced bakers. First and foremost, the use of mashed potatoes elevates the texture to a new level of fluffy softness that is hard to resist. The process is simple yet rewarding—perfect for those who love homemade recipes that deliver satisfying results without requiring extensive experience in the kitchen.
Another advantage is the versatility of these rolls. They can be served at any occasion, whether it’s a Sunday family dinner, holiday gatherings, or even casual barbecues. Plus, they freeze beautifully, making them an excellent option for meal prep. They’re not just a side dish but a comforting addition that can turn any meal into a memorable feast, providing warmth and satisfaction with every bite.
What Makes This Recipe Special
What truly sets this recipe apart is the combination of familiar ingredients that work together in harmony. The active dry yeast brings the rolls to life, creating that coveted rise and airy texture. The blend of whole milk and melted butter contributes to their rich flavor, ensuring that each roll is moist and delectable. Additionally, the subtle sweetness from the sugar and the added flavor of mashed potatoes create a delightful balance that enhances the overall taste.
Moreover, these rolls not only complement main dishes, but they also serve as an excellent vehicle for soups, stews, or your favorite spread. You can enjoy these rolls fresh from the oven or save them for later, making this recipe both practical and delicious. What more can you ask for than a recipe that captures the essence of comfort food while remaining effortless to achieve?
Ingredients
active dry yeast: Vital for creating yeast rolls, it helps the dough rise and gives it a light texture.
granulated sugar: Adds sweetness and helps activate the yeast for a better rise.
whole milk: Creates a rich moistness in the dough, contributing to a tender texture.
unsalted butter: Provides flavor and helps create a soft texture in the rolls.
large egg: Offers structure and moisture, enriching the overall flavor.
mashed potatoes: The secret ingredient that adds softness and flavor to the rolls.
salt: Enhances the overall flavor of the dough, balancing sweetness.
all-purpose flour: Forms the base of the dough, providing structure and stability.
How to Make Potato Dinner Rolls
STEP 1. Proof the yeast. Combine the active dry yeast with granulated sugar and warm whole milk; let sit until frothy, about 5-10 minutes.
STEP 2. Add wet ingredients. Mix in half of the melted unsalted butter and the large egg until well combined.
STEP 3. Incorporate mashed potatoes. Gently fold in the mashed potatoes until evenly distributed in the mixture.
STEP 4. Add flour and salt. Gradually mix in salt and all-purpose flour to create a cohesive dough.
STEP 5. Knead the dough. Turn the dough out onto a floured surface and knead for about 10 minutes, until smooth and elastic.
STEP 6. First rise. Place the dough in a greased bowl, cover it, and let rise for about 1 hour, or until doubled in size.
STEP 7. Punch down and roll out. After rising, punch down the dough, roll it out, and cut into 12 equal pieces.
STEP 8. Shape rolls. Form each piece into a ball and place them in a greased baking dish.
STEP 9. Second rise. Cover the rolls and let rise for another hour, until puffed.
STEP 10. Preheat the oven. Preheat your oven to 350°F during the second rise to prepare for baking.
STEP 11. Bake the rolls. Place the baking dish in the oven and bake for about 30 minutes, until golden brown on top.
STEP 12. Brush with butter. Immediately brush the baked rolls with the remaining melted butter for added flavor and shine.
STEP 13. Store leftovers. Keep any unused rolls at room temperature for up to 3 days, or freeze them for future meals.

Pro Tips
To achieve perfectly fluffy rolls, make sure to use warm— not hot—milk when proofing the yeast; temperatures around 110°F are ideal. Kneading is key; ensure you work the dough until it feels smooth and elastic, which typically takes around 10 minutes. If your kitchen is on the cooler side, creating a warm environment for the dough to rise can help; try placing it in an oven that’s turned off but still holds residual heat.
For an extra touch, consider adding herbs or garlic into the dough for flavor variations. Ensure your baking dish is well greased, as this will prevent any sticking while also allowing for easy removal post-baking. Always keep an eye on the rolls during the last few minutes of baking, as oven temperatures can vary; you want that ideal golden hue. Lastly, don’t skip the melted butter brushing right after baking; it adds an irresistible gloss and richness.
Common Mistakes to Avoid
One common pitfall is not allowing the yeast to proof sufficiently, which can lead to flat rolls. Make sure that the yeast bubbles up before you mix in the other ingredients. Over-kneading can also occur; keep an eye on the texture. If it’s too tough or rubbery, you may have gone too far.
When shaping the rolls, strive for uniform sizes to ensure even baking. If you place rolls too close together in the baking dish, they can merge and bake unevenly. Additionally, don’t rush the rising times; the dough needs time to develop its structure and flavor, so be patient. Lastly, remember to avoid opening the oven excessively while baking to maintain consistent heat, which can affect the final outcome.
Variations
• Add fresh herbs like rosemary or thyme for an aromatic flair.
• Incorporate roasted garlic into the dough for a savory twist.
• Swap out whole milk for almond or oat milk for dairy-free options.
• Sprinkle grated cheese on top before baking for a cheesy crust.
• Mix in spices such as cinnamon for a slightly sweet, aromatic touch.
Serving Ideas
These mouthwatering rolls can be served alongside your favorite soups or stews, perfect for sopping up delicious broths. They make an excellent complement to roasted meats, enhancing their flavors with each bite. For breakfast, consider toasting them lightly and adding jam or honey for a delightful start to your day.
Creating sliders with the rolls by adding pulled pork or brisket can also elevate your game-day snacks. Lastly, don’t hesitate to use them in place of traditional bread for sandwiches, where their soft texture shines through.
Meal Prep & Storage
To prep these rolls in advance, you can prepare the dough and freeze it after the first rising. Simply shape the rolls and place them in a greased dish, then wrap in plastic wrap and foil before freezing. When ready to use, let them thaw and rise for a couple of hours before baking.
For storing baked rolls, allow them to cool completely, then place them in an airtight container at room temperature for up to three days. You can also freeze the rolls for longer storage; just wrap them well to avoid freezer burn. To enjoy, thaw at room temperature or warm them in the oven for a few minutes until heated through and fresh.
FAQs
Can I use instant yeast instead of active dry yeast?
Yes, you can substitute instant yeast for active dry yeast, and there is no need to proof it; simply mix it directly into the dry ingredients.
Can I make these rolls ahead of time?
Absolutely! You can prepare the dough ahead, rise it, shape it, and freeze before the second rise. Simply thaw and allow to rise before baking.
What can I do if my rolls don’t rise?
Make sure your yeast is fresh and properly activated. If the environment is too cold, consider warming it slightly.
How do I reheat leftover potato rolls?
Reheat them in the oven at a low temperature until warmed through, or microwave for a few seconds. Wrapping them in a damp paper towel will help keep them moist.
Can I substitute the mashed potatoes?
While mashed potatoes provide excellent texture and flavor, sweet potatoes can make a lovely alternative, offering a different sweetness and color.
Are these rolls suitable for freezing?
Yes, these rolls freeze extremely well. Just wrap them tightly after they’ve cooled, and they’ll maintain their quality for several months.
Conclusion
Creating a batch of homemade rolls is one of the simplest ways to bring warmth and comfort into your home. With their soft texture and buttery flavor, these delicious rolls are sure to become a favorite at your family table. Whether enjoyed fresh out of the oven or saved for later, they are a testament to the joy of baking. Try this recipe today and watch them quickly disappear from your table!
Potato Dinner Rolls
Ingredients
Method
- Proof the yeast by combining active dry yeast, granulated sugar, and warm whole milk; let sit until frothy, about 5-10 minutes.
- Mix in half of the melted unsalted butter and the large egg until well combined.
- Gently fold in the mashed potatoes until evenly distributed in the mixture.
- Gradually mix in salt and all-purpose flour to create a cohesive dough.
- Turn the dough out onto a floured surface and knead for about 10 minutes, until smooth and elastic.
- Place the dough in a greased bowl, cover it, and let rise for about 1 hour, or until doubled in size.
- After rising, punch down the dough, roll it out, and cut into 12 equal pieces.
- Form each piece into a ball and place them in a greased baking dish.
- Cover the rolls and let rise for another hour, until puffed.
- Preheat your oven to 350°F during the second rise to prepare for baking.
- Place the baking dish in the oven and bake for about 30 minutes, until golden brown on top.
- Immediately brush the baked rolls with the remaining melted butter for added flavor and shine.
- Keep any unused rolls at room temperature for up to 3 days, or freeze them for future meals.