
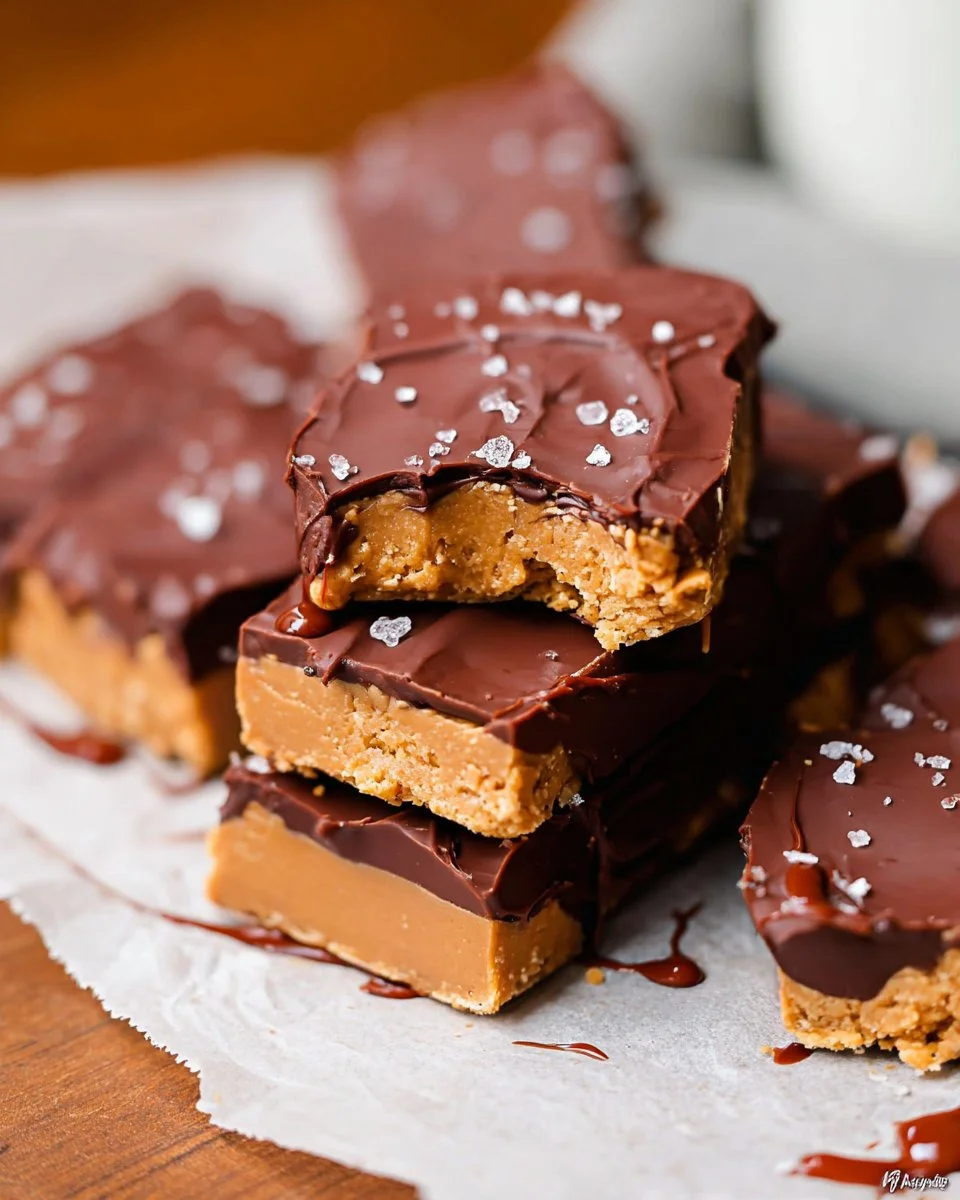
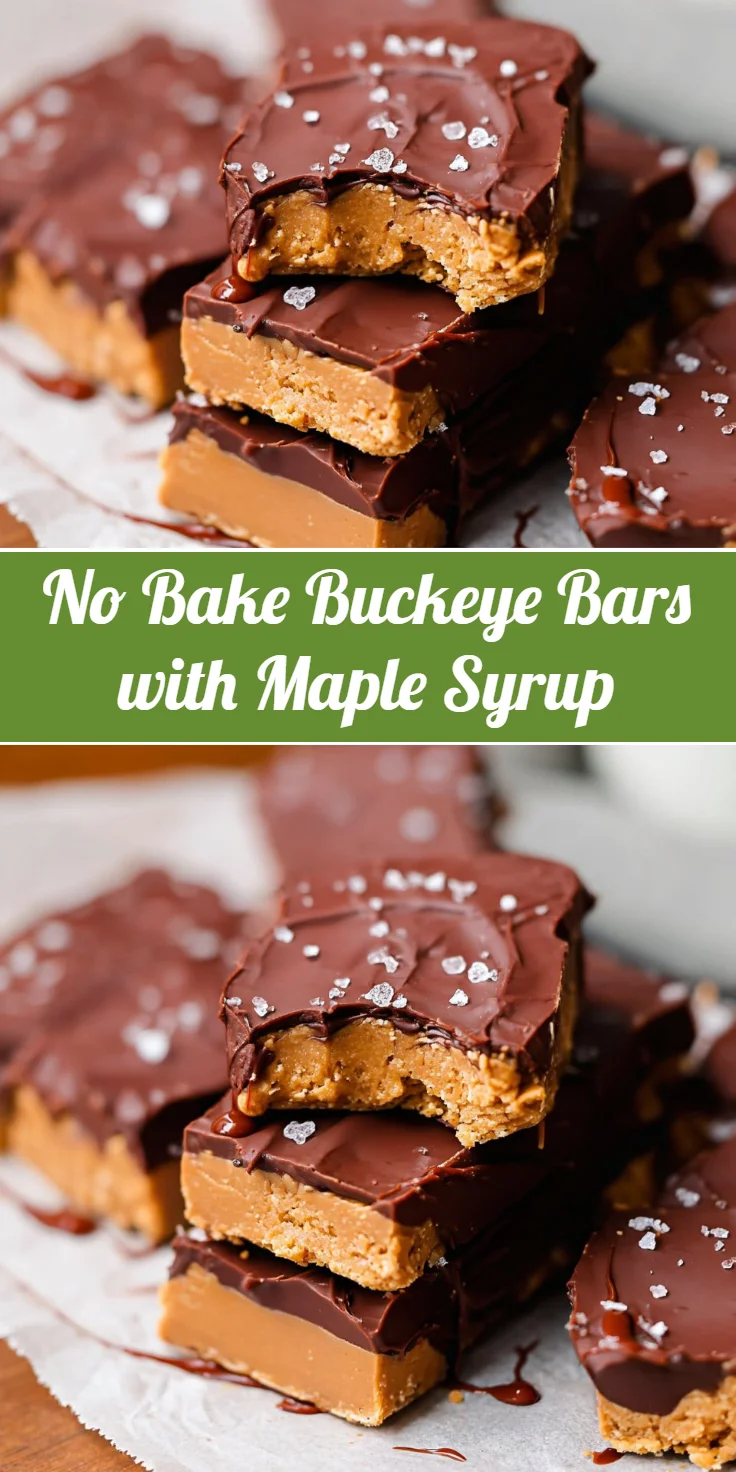
No-bake desserts are a lifesaver for those hectic days when time feels scarce, yet your sweet tooth calls out. These No Bake Buckeye Bars with Maple Syrup bring together the satisfying crunch of graham crackers and the creamy richness of peanut butter. Imagine sinking your teeth into a heavenly blend of flavors and textures, where the nutty essence of cashews meets the sweet, caramel undertones of maple syrup. These bars not only cater to your cravings but also fit seamlessly into your busy lifestyle.
Perfect for family gatherings, school events, or just a blissful afternoon treat, you can whip them up quickly and chill them until ready to serve. Save time without sacrificing on taste or quality, making it effortless to impress loved ones. Their crave-worthy nature, paired with a healthy twist, makes them a delightful addition to any dessert table while ensuring you satisfy your sweet tooth guilt-free.
Quick Answer
No Bake Buckeye Bars with Maple Syrup are no-bake dessert bars made from peanut butter, cashews, and graham crackers, offering a delightful balance of sweet and nutty flavors. They’re perfect for busy families looking for a quick and easy treat that everyone will love!
Why You’ll Love This Recipe
These no-bake bars are the perfect combination of flavors and textures, making them a go-to treat for any occasion. The richness of the peanut butter and the sweet maple syrup create an indulgent experience that feels both comforting and nostalgic. Additionally, they are convenient for meal prep, allowing you to make them ahead of time.
- Rich in protein and healthy fats.
- Wholesome ingredients that feel good to indulge in.
- Quick preparation without turning on the oven.
- Perfect for busy weeknights or casual gatherings.
- Fun activity for kids to help with.
- Easily customizable with different chocolate toppings.
What Makes This Recipe Special
The balance between crunchy and creamy in these buckeye bars is unmatched. The graham cracker crust offers a satisfying crunch that complements the gooey peanut butter and cashew filling, creating a harmonious blend of textures. This recipe is incredibly simple, making it perfect for bakers of any skill level. Additionally, there’s an emotional comfort tied to traditional flavors, bringing you back to childhood treats. It’s this combination of nostalgia and convenience that truly sets this dessert apart.
Kitchen Tools You’ll Need
- Food Processor – Essential for blending the crust and filling smoothly.
- 8×8 Pan – Used to set and chill the bars.
- Spatula – Helpful for spreading the filling evenly.
- Measuring Cups – To ensure you have just the right amount of ingredients.
Ingredients
Smooth Peanut butter: Adds creaminess and the characteristic flavor.
Cashews: Provides a rich, nutty texture and healthy fats.
Maple syrup: Sweetens the mixture with a natural, warm flavor.
Coconut flour or vegan pea protein: Optional thickener for added consistency.
Graham crackers: Forms the crunchy base for the bars.
Milk of choice: Binds the crust and helps achieve the right texture.
Chocolate: Drizzled on top for a sweet finish.
Peanut butter: Used alongside the smooth variety for enhanced flavor.
Ready to cook? Scroll to the recipe card below for exact measurements.
How to Make No Bake Buckeye Bars with Maple Syrup
STEP 1. Make the crust. In a food processor, combine graham crackers and milk to create a thick consistency.
STEP 2. Press the crust. Transfer the mixture into an 8×8 pan and press down to form an even layer.
STEP 3. Prepare the filling. In the food processor, add cashews, maple syrup, and peanut butter, pulsing until smooth and gooey.
STEP 4. Thicken if needed. If too liquid, add coconut flour or vegan pea protein and blend until combined.
STEP 5. Layer the filling. Spread the peanut butter mixture evenly on top of the crust.
STEP 6. Top with chocolate. Melt and pour your choice of chocolate over the filling, smoothing it out as necessary.
STEP 7. Chill. Refrigerate for 3 hours until set completely.
STEP 8. Slice and serve. Cut into squares and enjoy the rich, creamy goodness!
Why This Recipe Works
The texture achieved in these bars is a delightful balance. The crust provides a pleasing crunch that contrasts beautifully with the creamy, smooth filling. The blend of peanut butter and maple syrup ensures a sweet yet nuanced flavor, while the addition of chocolate ties everything together harmoniously. Not using any heat allows the flavors to meld together naturally, preserving the fresh taste of each ingredient. This simplicity cuts down on both cooking time and complexity, making it easy for anyone to recreate and enjoy.
Pro Tips for Best Results
- For a richer chocolate flavor, use dark chocolate over milk chocolate.
- Ensuring the filling is well-blended prevents any graininess.
- Chill the mixture long enough to solidify properly for clean slices.
- Add a sprinkle of sea salt on top to enhance the overall flavor.
- For a fun twist, mix in mini chocolate chips into the filling.
Common Mistakes to Avoid
Mistake: Using too much milk in the crust.
Why it happens: It can lead to a soggy base.
How to fix it: Start with less milk and add in small increments until the desired consistency is achieved.
Mistake: Not chilling long enough.
Why it happens: Impatience can lead to messy slices.
How to fix it: Allow the bars to chill for a full three hours or overnight.
Mistake: Over-processing the filling.
Why it happens: This can make it runny instead of gooey.
How to fix it: Pulse just until combined.
Recipe Variations
- Substitute almond butter for peanut butter for a nut-free option.
- Add crushed pretzels for a salty crunch in the filling.
- Include dried fruits like cranberries for extra sweetness.
- Try using different flavored chocolate, like white or salted caramel.
- Make them vegan by ensuring all ingredients are plant-based.
Nutrition Highlights
| Nutrient | Details |
|---|---|
| Protein | Rich source from peanut butter and cashews. |
| Fiber | Contains dietary fiber from graham crackers. |
| Carbohydrates | Balanced amount from the crust and maple syrup. |
| Healthy Fats | Peanut butter and cashews provide beneficial fats. |
| Calorie-Conscious Benefits | Enjoy satisfyingly without excessive calories. |
How to Serve No Bake Buckeye Bars with Maple Syrup
- Serve with a dollop of whipped cream for extra creaminess.
- Pair with fresh fruit slices for a delightful contrast.
- Drizzle with extra melted chocolate before serving for added allure.
- Garnish with chopped nuts or sea salt for added texture.
Best Occasions for This Recipe
These delightful bars are perfect for:
- Weeknight dinners when dessert cravings hit.
- Holidays that call for sweet treats.
- Meal prep due to their quick and straightforward nature.
- Family gatherings to impress with minimal effort.
- Potlucks, as they are easy to transport and share.
Make Ahead & Storage
Can This Be Meal Prepped
Absolutely! These bars can be made ahead of time and stored in the fridge, saving you time when needed.
Storing Leftovers
Store leftovers in an airtight container in the fridge for up to a week.
Freezing
You can also freeze the bars. Cut them into squares and wrap securely to maintain texture.
Reheating
No reheating is necessary; simply enjoy them cold.
However, if you prefer, let them sit at room temperature for a few minutes before serving.
Creative Ways to Use Leftovers
Transform leftovers into:
- Wraps with fresh fruit.
- Bowl meals layered with yogurt and granola.
- Sandwiches between slices of banana.
- Lunch box treats that are healthy and fun.

FAQs
Can I use other nut butters?
Yes! Almond or cashew butter can be substituted for peanut butter.
How long do these bars last in the fridge?
These bars can be stored in the fridge for up to one week.
Can I freeze the buckeye bars?
Yes, they freeze well! Just make sure to wrap them tightly to prevent freezer burn.
What if my mixture is too runny?
Add a bit more coconut flour or pea protein to thicken up your filling.
How do I cut the bars neatly?
Use a warm knife to cut through the bars for clean edges without crumbling.
Save This Recipe for Later
If you love this recipe, save it for later on Pinterest or bookmark it for easy access. Share with friends and family who will appreciate this delectable treat!
Final Thoughts
These no-bake bars promise a delightful combination of flavors and satisfyingly different textures. They’re incredibly convenient for busy lifestyles, and the protein-packed ingredients ensure they’re a great treat for families. Give this recipe a try and indulge in a sweet moment with loved ones!

No Bake Buckeye Bars with Maple Syrup
Ingredients
Method
- In a food processor, combine graham crackers and milk to create a thick crust mixture.
- Transfer the crust mixture into an 8x8 pan and press down to form an even layer.
- In the food processor, add cashews, maple syrup, and smooth peanut butter, pulsing until smooth.
- If too liquid, add coconut flour or pea protein and blend until well combined.
- Spread the peanut butter mixture evenly on top of the pressed crust.
- Melt chocolate and pour it over the filling, smoothing it out evenly.
- Refrigerate for 3 hours until set completely.
- Cut into squares and serve.