

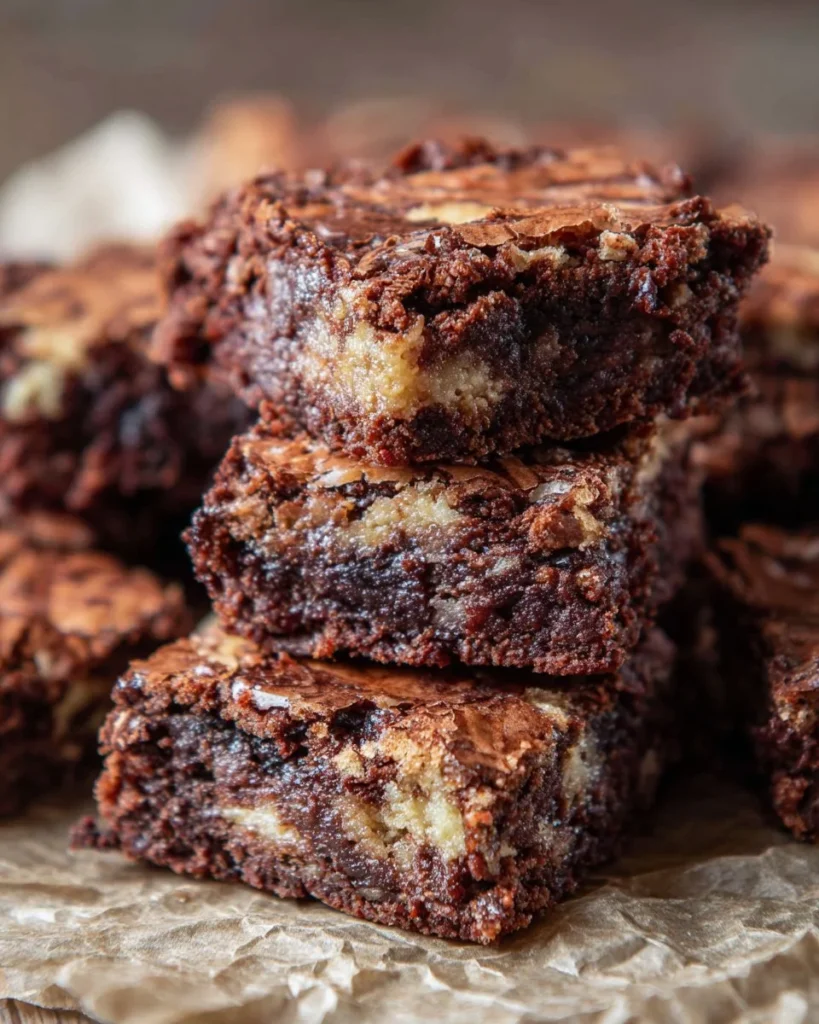
Indulging in a dessert that perfectly balances chocolatey richness and sweet creaminess can elevate any occasion. Homemade treats often carry the warmth of love and care, making them a staple for gatherings, celebrations, or simply as a guilty pleasure. These brownies deliver a marvelous combination of dark and white chocolate that will delight any palate. With a textured, fudgy base complemented by the creamy swirls, they are the epitome of comfort food recipes. Imagine biting into a square and experiencing the decadent layers melt in your mouth, each moment rich with flavor. This recipe not only satisfies your sweet cravings but also leaves a lasting impression on those you share it with. Gather your ingredients and prepare to create something truly special that will have everyone coming back for more!
Why You’ll Love This Recipe
There’s something undeniably charming about homemade desserts, and these brownies are no exception. First and foremost, they are incredibly easy to make, allowing even novice bakers to achieve impressive results. The blend of dark and white chocolate means you get the best of both worlds—rich, bold flavors harmonized with a sweet creaminess. The texture is equally delightful, featuring a moist, chewy interior with a slightly crispy top that only adds to the experience. Plus, they can be easily customized to suit your preferences or dietary needs, making them versatile for any crowd. Whether you’re preparing for a family movie night, hosting a birthday celebration, or simply treating yourself, these brownies are a must-have dessert.
What Makes This Recipe Special
What truly sets this brownie recipe apart is its simplicity combined with gourmet appeal. You don’t need extravagant ingredients to create something that tastes luxurious. Just basic pantry staples come together to make these fudgy delights, resulting in a dessert that’s approachable yet impressive. The marbling effect from the two chocolate types not only looks gorgeous but also allows for a visual and textural contrast that delights the senses. The ease of preparation means you can whip up these homemade brownies quickly; they bake in under 30 minutes and require minimal cleanup. They also hold their flavor well, making them suitable for various occasions, whether served warm with a scoop of ice cream or enjoyed cold straight from the fridge.
Ingredients
dark chocolate: A rich chocolate that brings depth and intensity to the brownies.
white chocolate: Adds a creamy sweetness, balancing the bitterness of dark chocolate.
butter: Contributes to moisture and flavor, resulting in a tender texture.
granulated sugar: Sweetens the batter and helps create a chewy crust.
eggs: Provide structure and binding, enriching the overall texture of the brownies.
vanilla extract: Enhances the chocolate flavor with a warm, aromatic note.
all-purpose flour: Adds stability and helps achieve the perfect brownie consistency.
salt: Balances sweetness and enhances the flavors in the recipe.
How to Make Homemade Marble Brownies
STEP 1. Preheat the oven. Set your oven to 350°F / 180°C to prepare for baking.
STEP 2. Prepare the baking pan. Grease and flour an 8-inch square pan or line it with parchment paper for easy removal.
STEP 3. Melt the chocolate. Melt the dark and white chocolate separately, then let them cool until they are lukewarm.
STEP 4. Cream the butter and sugar. In a mixing bowl, beat the softened butter and granulated sugar until fluffy, approximately 2-3 minutes.
STEP 5. Add the eggs. Introduce the eggs one at a time, beating well after each addition to fully incorporate them.
STEP 6. Stir in the vanilla. Add the vanilla extract to your mixture for a burst of flavor.
STEP 7. Combine dry ingredients. Gradually mix in the all-purpose flour and a pinch of salt using a wooden spoon or spatula.
STEP 8. Separate the batter. Transfer half of the brownie batter to a clean bowl, then stir in the melted dark chocolate.
STEP 9. Incorporate the white chocolate. In the original mixing bowl, gently fold the melted white chocolate into the remaining batter.
STEP 10. Layer the dark chocolate batter. Spread half of the dark chocolate batter into the bottom of the prepared pan evenly.
STEP 11. Add the white chocolate batter. Drop spoonfuls of the white chocolate batter on top of the dark chocolate layer, gently spreading it out.
STEP 12. Top with remaining batter. Spoon the rest of the dark chocolate batter on top, using a knife to swirl the layers for a marbled effect.
STEP 13. Bake the brownies. Place the pan in the preheated oven and bake for 20-25 minutes, until the sides pull away slightly and a toothpick comes out with moist crumbs.
STEP 14. Cool before serving. Allow the brownies to cool in the pan on a wire rack before cutting into squares.

Pro Tips
To ensure your brownies turn out perfectly every time, here are some helpful tips. Always use room temperature eggs, as they mix better into the batter, helping to achieve that desired fudgy texture. When melting chocolate, be careful not to overheat it; use a microwave in short bursts or a double boiler for even melting without burning. If you want to add a little extra flair, consider sprinkling some flaky sea salt over the top immediately after baking for a delightful contrast. Finally, let the brownies cool completely before cutting to ensure clean edges and squares rather than crumbling. Taking these extra steps will help you achieve the most delicious and visually appealing results.
Common Mistakes to Avoid
Even the best bakers can run into issues when making brownies. One common mistake is overmixing the batter, which can lead to dense and tough brownies. Mix until just combined for the best texture. Another mistake is using cold ingredients, which can affect how well the batter incorporates; make sure to use room temperature eggs and softened butter. Additionally, keep an eye on your bake time; ovens vary, and checking your brownies a few minutes early can prevent them from overbaking. Finally, don’t forget to let your brownies cool in the pan before slicing, as this allows them to set up properly and helps maintain their fudgy consistency.
Variations
• Incorporate nuts for added crunch and richness.
• Add a swirl of peanut butter for a delightful flavor twist.
• Mix in chocolate chips for an extra chocolatey treat.
• Experiment with different chocolates like milk chocolate or dark chocolate to adjust the flavor.
• Use flavored extracts, like almond or peppermint, for a unique taste profile.
Serving Ideas
These brownies are wonderfully versatile and can be enjoyed in various ways. Serve them warm with a scoop of vanilla ice cream and a drizzle of hot fudge for an indulgent dessert. Pair them with a dollop of whipped cream and fresh berries for a refreshing contrast. For a fun twist, cut the brownies into shapes using cookie cutters and top them with colorful sprinkles for birthday parties or celebrations. They also make an excellent addition to a dessert platter alongside other homemade sweets like cookies or mini cheesecakes, allowing everyone to indulge in a little bit of everything.
Meal Prep & Storage
For those who like to plan ahead, these marble brownies can be made in advance and stored easily. Once cooled, wrap them in plastic wrap or foil and store them in an airtight container at room temperature for up to five days. For longer storage, consider freezing the brownies by wrapping them individually and placing them in a freezer-safe container. They can last for up to three months in the freezer. When you’re ready to enjoy, simply thaw at room temperature, or warm them slightly in the oven or microwave for that just-baked taste. This makes them perfect for quick family meals or unexpected guests!

FAQs
Can I use different types of chocolate?
Absolutely! Feel free to experiment with milk chocolate, semi-sweet, or even flavored chocolate variations for a unique twist on the recipe.
Do I have to use both dark and white chocolate?
Not at all! You can choose to use just one type of chocolate if you prefer, adjusting the recipe to match your tastes.
How do I know when the brownies are done?
Brownies are done when the edges pull away from the pan, and a toothpick inserted in the center comes out with a few moist crumbs, not wet batter.
Can I add ingredients like nuts or caramel?
Yes! Adding chopped nuts or a swirl of caramel can enhance the flavor and texture of your brownies.
How should I store leftovers?
Leftover brownies can be stored in an airtight container at room temperature or in the refrigerator for a few days. For longer storage, consider freezing them.
Conclusion
Baking homemade marble brownies is a delightful experience that combines simple ingredients into an impressive treat. The blend of rich dark and sweet white chocolate creates a dessert that is both satisfying and visually stunning. Whether you’re preparing for a celebration or simply treating yourself, this recipe is sure to become a cherished favorite. Enjoy the rich flavors and soft textures in every bite!
Marble Brownies
Ingredients
Method
- Preheat the oven to 350°F / 180°C.
- Grease and flour an 8-inch square pan or line it with parchment paper.
- Melt the dark and white chocolate separately and let them cool until lukewarm.
- In a mixing bowl, beat the softened butter and granulated sugar until fluffy, about 2-3 minutes.
- Introduce the eggs one at a time, beating well after each addition. Mix in the vanilla extract.
- Gradually mix in the flour and salt using a wooden spoon or spatula.
- Transfer half of the brownie batter to a clean bowl and mix in the melted dark chocolate.
- In the original mixing bowl, gently fold the melted white chocolate into the remaining batter.
- Spread half of the dark chocolate batter into the prepared pan evenly.
- Drop spoonfuls of the white chocolate batter on top of the dark layer, gently spreading it out.
- Spoon the rest of the dark chocolate batter on top, using a knife to swirl the layers for a marbled effect.
- Bake for 20-25 minutes until the edges pull away slightly, and a toothpick comes out with moist crumbs.
- Allow the brownies to cool in the pan on a wire rack before cutting into squares.