When life gets busy, it’s essential to have quick, nutritious snacks on hand that both satisfy cravings and provide energy. Picture a treat that’s chewy, nutty, and oh-so-comforting—a no-bake option that fits seamlessly into your daily routine. These delightful bars not only offer simplicity in preparation but also pack in a wealth of flavors that will keep your taste buds dancing. This recipe is perfect for families on the go, health-conscious individuals looking for high-protein snacks, or anyone needing a delightful pick-me-up.
Ready to discover how you can whip up these scrumptious no-bake bars in just a few simple steps? Whether you enjoy them as a midday snack, post-workout fuel, or a sweet indulgence, they’re a versatile addition to your meal-prep lineup, making them a great choice for busy lifestyles.
Quick Answer
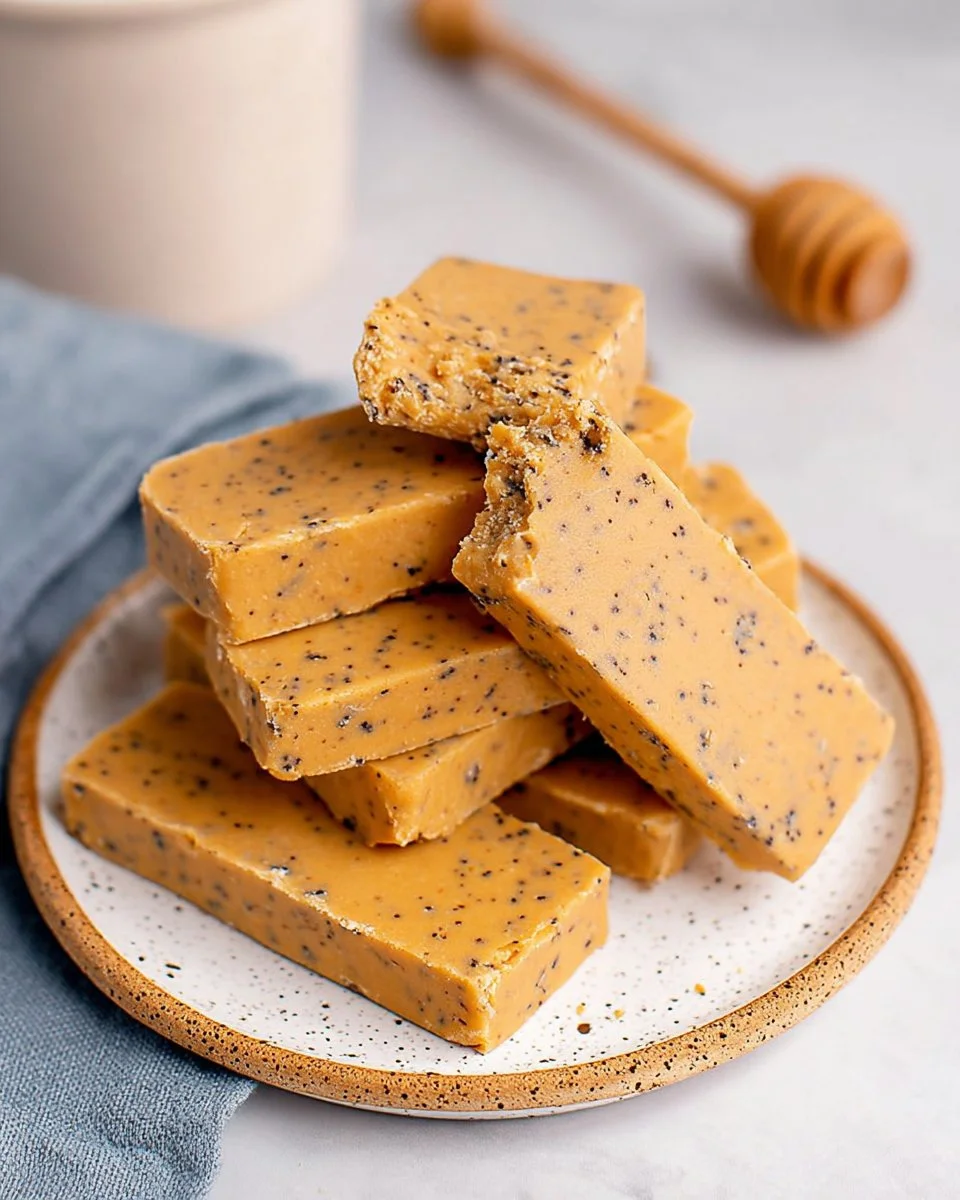
No Bake Perfect Bar is a simple, no-fuss snack made from almond flour, peanut butter, honey, and flavorful add-ins. It’s a popular choice among busy families and health-minded individuals seeking high-protein, satisfying treats that are easy to prepare.
Why You’ll Love This Recipe
This no-bake recipe leads the way for those who crave convenience without sacrificing taste. With a delightful combination of nutty flavors and a satisfyingly chewy texture, it’s a snack that will keep both kids and adults reaching for more.
- High-protein energy boost perfect for busy days.
- No baking required, making it easy to prepare.
- Customizable with optional add-ins like chocolate chips or chia seeds.
- Great for meal prep, ensuring you have snacks ready to go.
- Versatile toppings or pairings for a personalized touch.
- Healthy, wholesome ingredients for guilt-free munching.
- Suitable for cold storage, ideal for snacks on demand.
What Makes This Recipe Special
This no-bake bar stands out with its perfect balance of texture and flavor. The almond flour provides a gentle nutty taste, which pairs beautifully with the creamy texture of peanut butter. The touch of honey adds natural sweetness, while optional add-ins can elevate the flavor profile even further. What truly sets it apart is its simplicity—no cooking required means you can whip these up in a flash, making them a satisfying treat to satisfy your sweet tooth and keep hunger at bay.
Kitchen Tools You’ll Need
- Mixing Bowl – Essential for combining your ingredients smoothly.
- Wooden Spoon – Perfect for mixing, ensuring everything is well incorporated.
- Baking Pan – Needed for shaping your bars. An 8×4 or 8×8 inch pan works well.
- Parchment Paper – Helps prevent sticking and makes for easy removal.
- Measuring Cups – If you need precise quantities for other variations.
Ingredients
almond flour: A nutty base that adds a gluten-free option to your bars.
peanut butter: Provides a creamy texture and rich flavor.
honey: Natural sweetener that binds the ingredients together.
vanilla extract: Adds warmth and enhances the overall flavor profile.
chia seeds: Optional add-in for extra fiber and a nutritional boost.
mini chocolate chips: Optional add-in for a touch of sweetness and indulgence.
Ready to cook? Scroll to the recipe card below for exact measurements.
How to Make No Bake Perfect Bar
STEP 1. Combine the wet ingredients. In a large bowl, combine peanut butter, honey, and vanilla extract. Stir until well combined.
STEP 2. Add the dry ingredients. Add in almond flour and mix until a soft and smooth dough forms.
STEP 3. Incorporate add-ins. Fold in any optional add-ins (chocolate chips, chia seeds, etc.) if using.
STEP 4. Prepare the pan. Line an 8×4 (thicker bars) or 8×8 inch (thinner bars) pan with parchment paper.
STEP 5. Press the mixture. Press the mixture evenly into the pan using your hands or the back of a spoon.
STEP 6. Freeze for firmness. Freeze for 20 minutes, or until firm.
STEP 7. Cut into bars. Remove from the pan and cut into bars or squares.
If the mixture feels too dry, add a small drizzle of peanut butter or honey and mix again. If it is too wet, add more almond flour as needed.
Keep them in the freezer for longer storage (up to 3 months) or store in the fridge for softer, chewier bars (up to 2-3 weeks).
Why This Recipe Works
The balance of the chewy almond flour with the creamy peanut butter creates a satisfying texture that feels indulgent without being overly heavy. Honey acts as a natural binder, helping everything stay together without added sugars or preservatives. These bars require no cooking, so you maintain the integrity of the ingredients, ensuring a snack that is both nutritious and wholesome. Likewise, the simplicity in preparation makes it accessible for anyone, regardless of culinary skills.
Pro Tips for Best Results
- Add a pinch of salt to enhance the flavors of the nut butter and honey.
- For a crunchier texture, consider adding nuts or seeds along with the optional add-ins.
- Don’t skip the freezing step; this helps the bars hold their shape when cutting.
- Add a sprinkle of sea salt on top before freezing for a sweet-salty flavor.
- Experiment with different nut butters for varied flavors based on preference.
Common Mistakes to Avoid
Mistake: Overmixing the dough.
Why it happens: Too much mixing can lead to dense bars.
How to fix it: Mix until just combined to keep the bars light and chewy.
Mistake: Not lining the pan with parchment paper.
Why it happens: Impatience or oversight can lead to sticking.
How to fix it: Always line the pan for easy removal.
Mistake: Freezing for too long.
Why it happens: Forgetting about them in the freezer.
How to fix it: Set a timer for the freeze time of 20 minutes.
Mistake: Using too much honey.
Why it happens: Trying to make the bars sweeter.
How to fix it: Stick to the recipe to maintain the right consistency.
Recipe Variations
- Add protein powder to increase the protein content.
- Substitute almond flour with oat flour for a different flavor.
- Incorporate dried fruits like cranberries or raisins for chewiness.
- Top with a layer of dark chocolate for added sweetness and decadence.
- Use maple syrup instead of honey for a vegan-friendly option.
Nutrition Highlights
| Nutrient | Per Serving |
|---|---|
| Protein | 8g |
| Fiber | 3g |
| Carbohydrates | 15g |
| Healthy Fats | 10g |
| Calories | 180 |
How to Serve No Bake Perfect Bar
- Pair with fresh fruit such as bananas or berries for a balanced snack.
- Drizzle with melted dark chocolate or yogurt for a sweet twist.
- Top with a dusting of powdered sugar for a dessert-like presentation.
- Serve alongside a smoothie for a wholesome breakfast option.
Best Occasions for This Recipe
These no-bake bars are versatile for various occasions, making them a fantastic choice for:
- Quick snacks during busy weeknight dinners.
- Sweet treats during holiday gatherings.
- Meal prep for quick access throughout the week.
- Family gatherings and potlucks where everyone can enjoy them.
Make Ahead & Storage
Can This Be Meal Prepped
Yes, these bars are perfect for meal prep, allowing you to quickly grab a snack whenever needed.
Storing Leftovers
Store in an airtight container in the fridge for up to 2-3 weeks. This keeps them soft and chewy.
Freezing
If you want them to last longer, freeze for up to 3 months. Just ensure they are well-wrapped in parchment or placed in an airtight container.
Reheating
No reheating is needed; simply thaw slightly if frozen before enjoying for the best texture.
Creative Ways to Use Leftovers
Leftover bars can be used creatively in:
- Wraps with fresh fruit and greens for a healthy lunch.
- Bowl meals topped with yogurt and granola.
- Sandwiches with creamy spreads for a delicious twist.
- Lunch boxes to provide energy throughout the school day.
FAQs
Can I use any nut butter for this recipe?
Yes, you can substitute with other nut butters like almond or cashew butter, though it may alter the flavor slightly.
How do I store leftover bars?
Keep them in an airtight container in the refrigerator for up to 2-3 weeks, or freeze for up to 3 months.
Can I make these bars vegan?
Absolutely! Use maple syrup instead of honey and ensure your nut butter is vegan.
What if my mixture is too dry?
Add a small drizzle of peanut butter or honey until you reach the desired consistency.
How can I make these bars sweeter?
Consider adding chocolate chips or adjusting the honey quantity for a sweeter taste.
Save This Recipe for Later
If you love this recipe, don’t forget to save it on Pinterest or bookmark it for later!
Final Thoughts
Your taste buds are in for a treat with these no-bake bars, offering a delightful blend of flavor and texture. They epitomize healthy convenience and are an ideal snack for any busy lifestyle. Give them a try, and don’t forget to share this delicious recipe with your friends and family!

No Bake Perfect Bar
Ingredients
Method
- In a large bowl, combine peanut butter, honey, and vanilla extract. Stir until well combined.
- Add in almond flour and mix until a soft and smooth dough forms.
- Fold in any optional add-ins (chocolate chips, chia seeds, etc.) if using.
- Line an 8x4 or 8x8 inch pan with parchment paper.
- Press the mixture evenly into the pan using your hands or the back of a spoon.
- Freeze for 20 minutes, or until firm.
- Remove from the pan and cut into bars or squares.