
For busy families navigating a gluten-free lifestyle, finding a satisfying bread that meets dietary needs can be a challenge. This gluten-free sandwich bread offers a wonderful solution. With its soft and fluffy texture, every slice is a comforting delight. Perfect for morning toast or delicious sandwiches, this recipe keeps your meal prep exciting and fulfilling. The subtle sweetness from maple syrup combined with the nutty flavor of gluten-free oats creates a sandwich bread that doesn’t just replace the traditional loaves but elevates lunchtime experiences to a whole new level.
Quick Answer
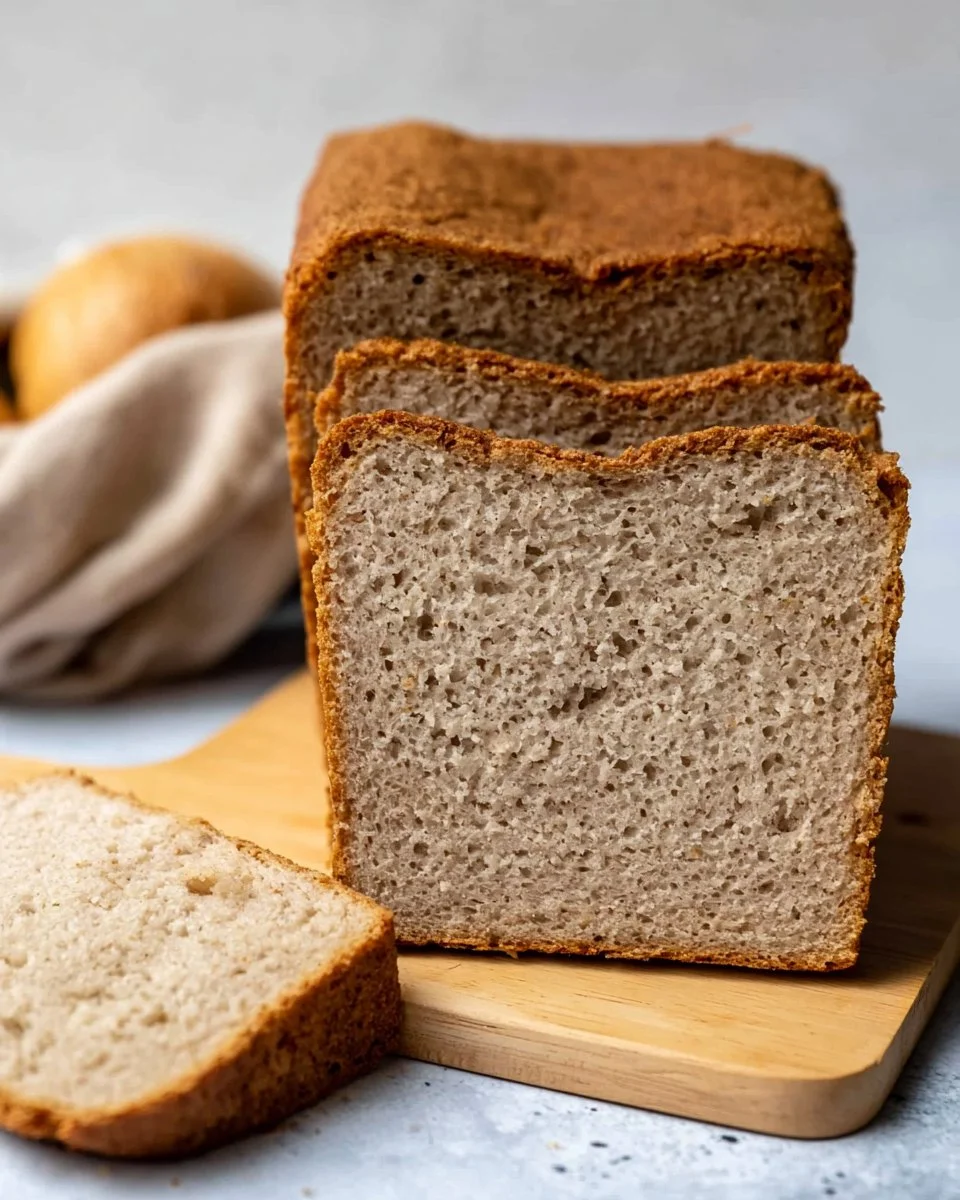
This gluten-free sandwich bread is a delightful and soft bread perfect for sandwiches or toast. It’s particularly popular with those who have dietary restrictions and want to maintain the familiar comfort of bread while enjoying healthy homemade options.
Why You’ll Love This Recipe
This gluten-free sandwich bread not only fulfills the craving for bread but also offers a versatile base for many meals. Its lightness and soft texture make it ideal for various toppings, from creamy spreads to savory dips. Plus, it’s simple to make, allowing you to bake and enjoy fresh bread straight from the oven. Whether you’re serving it for breakfast, lunch, or dinner, it’s sure to please everyone at the table.
- Healthier alternative to store-bought bread.
- Flexible ingredients for various flavor profiles.
- Perfect for meal prep – keep slices ready for the week.
- Kid-friendly and great for family lunches.
- Can be used for toasts, sandwiches, or even French toast.
- Easy to store and reheat.
- Rich in fiber, making it a wholesome choice.
What Makes This Recipe Special
This recipe stands out due to its unique combination of gluten-free ingredients, which together create a light and airy loaf. The psyllium husk gives the bread just the right amount of elasticity, resulting in a texture that’s soft yet holds its shape well for sandwiches. The success of this gluten-free bread lies in the balance of ingredients, ensuring each slice is not only fluffy but also sturdy enough to carry your favorite fillings. Plus, the ease of preparation offers tremendous practicality for meal-planning families.
Kitchen Tools You’ll Need
- High-speed blender – To grind the gluten-free oats into flour.
- Stand mixer – For mixing the dough effectively with the hook attachment.
- Pullman pan – Ideal for shaping the bread for a nice, even loaf.
- Measuring cups and spoons – For precise ingredient measurements.
- Instant-read thermometer – To check the internal temperature of the bread.
Ingredients
gluten-free oats: Ground into flour to create a soft base.
psyllium husk: Provides fiber and elasticity to the dough.
soy milk: Adds moisture and richness while being dairy-free.
brown rice flour: A key gluten-free flour that contributes to the bread’s structure.
potato starch: Adds lightness and helps to retain moisture.
tapioca starch: Enhances the chewiness and softness of the bread.
instant yeast: Leavens the bread, allowing it to rise.
salt: Enhances flavor and controls yeast activity.
baking powder: Provides extra leavening power.
maple syrup: A natural sweetener that adds a touch of flavor.
olive oil: Adds moisture and improves texture.
apple cider vinegar: Acts as a natural preservative and enhances the bread’s flavor.
Ready to cook? Scroll to the recipe card below for exact measurements.
How to Make Gluten-Free Sandwich Bread
STEP 1. Prepare the oat flour. Add the gluten-free oats to a high-speed blender and process until they resemble flour, leaving some larger pieces for texture.
STEP 2. Activate the psyllium husk. Warm the soy milk to 110ºF and combine with the psyllium husk in a small bowl, mixing well and allowing it to thicken.
STEP 3. Combine dry ingredients. In a stand mixer, mix the brown rice flour, oat flour, potato starch, tapioca starch, baking powder, and salt until well combined. Then, add the instant yeast and stir again.
STEP 4. Add wet ingredients. Incorporate the psyllium gel, maple syrup, olive oil, and apple cider vinegar into the flour mixture. Stir on low speed until combined, scraping down the bowl as needed.
STEP 5. Mix the dough. Increase the mixer speed to medium-low and mix for five minutes until a cohesive dough forms.
STEP 6. Rest the dough. Allow the dough to rest in the bowl for ten minutes.
STEP 7. Knead the dough. Transfer to a lightly floured surface, gently kneading until a smooth circle forms.
STEP 8. Shape the dough. Pat the dough into a rectangle the width of your bread pan, then roll it into a log, tucking the ends under.
STEP 9. Prepare for rising. Place the shaped dough in a Pullman pan, cover, and let rise in a warm area for about one hour until it doubles in size.
STEP 10. Preheat the oven. Place a pan of water on the bottom rack and preheat the oven to 400ºF.
STEP 11. Bake the bread. Once risen, place in the oven and reduce the temperature to 375ºF. Bake for 30 minutes with steam, then remove the steam pan and continue baking for another 20-30 minutes, until the internal temperature reaches 205ºF.
STEP 12. Cool the bread. Remove the loaf from the oven and allow it to cool completely before slicing, preferably letting it cool overnight to prevent gumminess.
Why This Recipe Works
This gluten-free sandwich bread combines the right balance of ingredients that interact beautifully during the baking process. The psyllium husk, when hydrated, mimics the gluten structure, helping the bread rise and maintain its form. Each ingredient plays a role: the starches contribute to a tender crumb while the yeast ensures a delightful lift. This meticulous crafting results in a loaf that is not only gluten-free but also has a texture that rivals its conventional counterparts, making it a comforting staple in any household.
Pro Tips for Best Results
- For enhanced flavor, consider adding herbs or seasoning to the dough.
- Ensure the water bath is present in the oven to create steam, aiding in a good crust.
- If you prefer a softer crust, wrap the loaf in a towel as it cools.
- Allow the bread to cool completely; this step prevents gumminess in the middle.
- Try using a food scale for precise measurements to ensure consistent results.
Common Mistakes to Avoid
Mistake: Slicing too soon.
Why it happens: It’s tempting to dig in after baking, but the bread needs time to set.
How to fix it: Allow the loaf to cool completely before cutting to avoid gummy slices.
Mistake: Not using the right pan.
Why it happens: A different-sized pan can lead to uneven baking.
How to fix it: Stick with a Pullman pan for the best shape and consistency.
Mistake: Incorrect water temperature.
Why it happens: Using water that is too hot or cold affects yeast activation.
How to fix it: Use a thermometer to check that the water is at 110ºF.
Mistake: Overmixing the dough.
Why it happens: Mixing too long can change the texture.
How to fix it: Follow the mixing time as specified without extending.
Mistake: Not letting the dough rise enough.
Why it happens: Cold temperatures slow yeast activity.
How to fix it: Allow for adequate rising time in a warm spot to ensure doubling in size.
Recipe Variations
- Herbed Bread: Add dried herbs like rosemary or thyme for added flavor.
- Multi-Grain Addition: Incorporate various seeds such as flax or sunflower for texture.
- Savory Cheese Bread: Mix in shredded cheese for a cheesy twist.
- Sweet Cinnamon Loaf: Add cinnamon and sugar for a sweet breakfast option.
- Nutty Bread: Fold in chopped nuts for an extra crunch.
Nutrition Highlights
| Nutrient | Per Serving |
|---|---|
| Protein | Varies based on serving size |
| Fiber | Rich source from oats and psyllium husk |
| Carbohydrates | Balanced for energy without gluten |
| Healthy Fats | Includes olive oil for heart health |
| Calories | Calorie-conscious depending on portion |
How to Serve Gluten-Free Sandwich Bread
- Use as a base for hearty sandwiches.
- Top with avocado and poached eggs for breakfast.
- Spread with nut butter or jam for a sweet treat.
- Serve with soups for a comforting meal.
- Cut into cubes for homemade croutons or crumbs.
Best Occasions for This Recipe
This gluten-free sandwich bread is perfect for:
- Weeknight dinners to complement your main dishes.
- Family gatherings where everyone can enjoy it.
- Meal prepping for easy lunches throughout the week.
- Holidays when accommodating gluten-free guests.
- Potlucks where you want to bring a unique dish.
Make Ahead & Storage
Can This Be Meal Prepped
Yes, you can prepare this gluten-free sandwich bread ahead of time and store it for up to five days, making it an excellent option for busy weeks.
Storing Leftovers
Store leftover bread in an airtight container in a cool, dry place. It can last around five days before it starts to lose freshness.
Freezing
Wrap the bread tightly in plastic wrap and then in foil before placing it in the freezer for up to three months. This helps keep the texture intact.
Reheating
To reheat, slice and toast in a toaster oven or warm it in the microwave for about 15-20 seconds, ensuring it doesn’t dry out.
Creative Ways to Use Leftovers
Leftover gluten-free sandwich bread can be repurposed into delicious:
- Wraps filled with your favorite deli meats and veggies.
- Bowls topped with proteins and salads.
- Hearty sandwiches for a next-day lunch.
- Lunch boxes with mini sandwiches or toast for kids.
FAQs
Can I use other types of flour?
Yes, but be aware that the texture and rising may vary. Always use a gluten-free blend if you want to maintain gluten-free status.
How should I store this bread?
Keep it in an airtight container at room temperature for up to five days, or freeze it for longer storage.
Can I make this bread vegan?
This recipe is already vegan-friendly due to using soy milk and no eggs.
How do I know when the bread is done baking?
Use an instant-read thermometer; the internal temperature should be at least 205ºF.
Can I add more sweetness to the bread?
Absolutely! Feel free to increase the maple syrup to your taste preference.
Save This Recipe for Later
If you love this gluten-free sandwich bread, make sure to save it to your Pinterest or bookmark it for easy access later!
Final Thoughts
Offering a delicious way to enjoy the comforts of bread, this gluten-free sandwich bread is a staple that fits seamlessly into a busy lifestyle. With its soft texture and delightful flavor, it meets both dietary needs and taste preferences. Try this recipe, save it for later, and explore other related bread recipes for even more satisfying meals!

Gluten-Free Sandwich Bread
Ingredients
Method
- Step 1: Prepare the oat flour by adding the gluten-free oats to a high-speed blender and process until they resemble flour, leaving some larger pieces for texture.
- Step 2: Activate the psyllium husk by warming the soy milk to 110ºF and combining it with the psyllium husk in a small bowl, mixing well and allowing it to thicken.
- Step 3: Combine dry ingredients in a stand mixer, mixing the brown rice flour, oat flour, potato starch, tapioca starch, baking powder, and salt until well combined. Then add the instant yeast and stir again.
- Step 4: Add wet ingredients by incorporating the psyllium gel, maple syrup, olive oil, and apple cider vinegar into the flour mixture, stirring on low speed until combined.
- Step 5: Mix the dough by increasing the mixer speed to medium-low and mixing for five minutes until a cohesive dough forms.
- Step 6: Rest the dough in the bowl for ten minutes.
- Step 7: Knead the dough on a lightly floured surface until a smooth circle forms.
- Step 8: Shape the dough into a rectangle the width of your bread pan, then roll it into a log, tucking the ends under.
- Step 9: Place the shaped dough in a Pullman pan, cover, and let rise in a warm area for about one hour until it doubles in size.
- Step 10: Preheat the oven with a pan of water on the bottom rack to create steam and set it to 400ºF.
- Step 11: Bake the bread by placing it in the oven and reducing the temperature to 375ºF. Bake for 30 minutes with steam, then remove the steam pan and continue baking for another 20-30 minutes, until the internal temperature reaches 205ºF.
- Step 12: Cool the bread completely before slicing, preferably letting it cool overnight to prevent gumminess.