

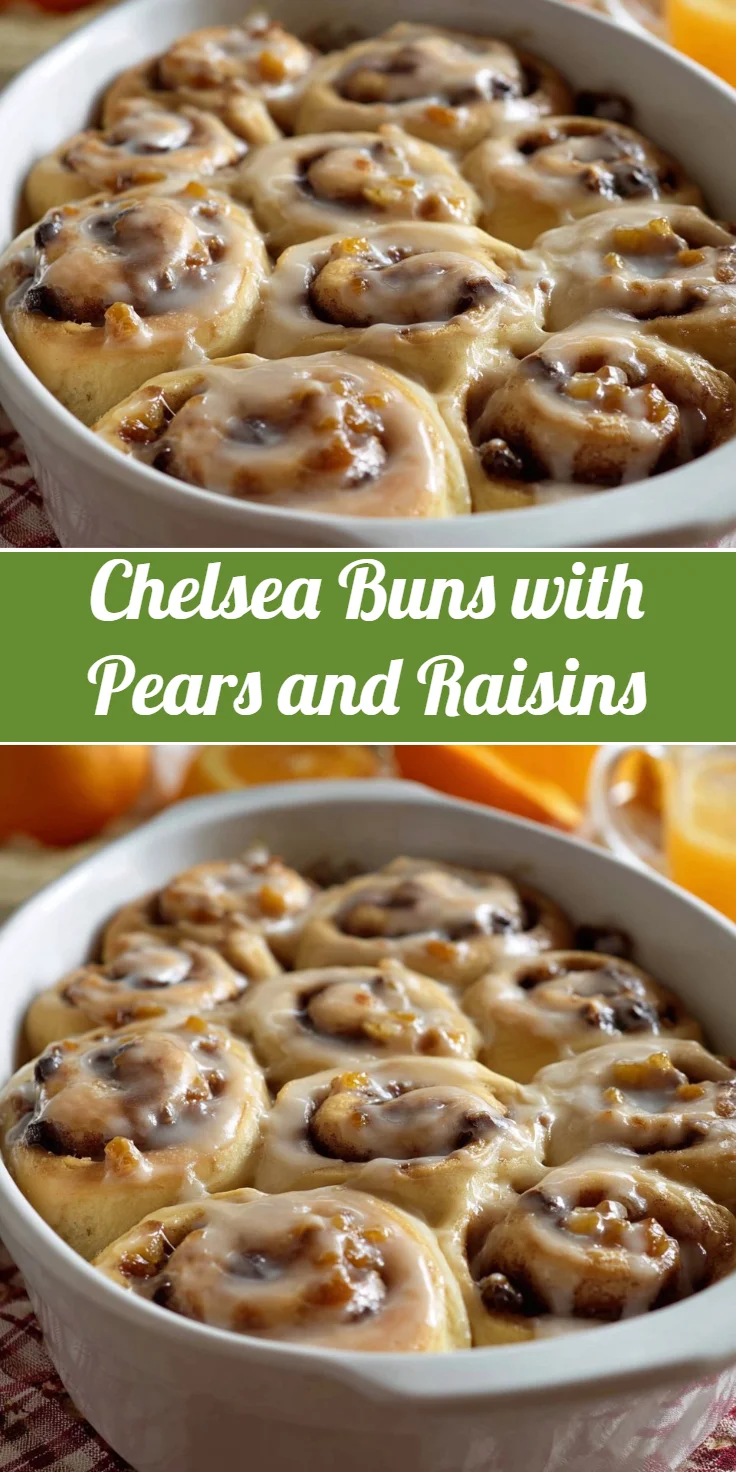
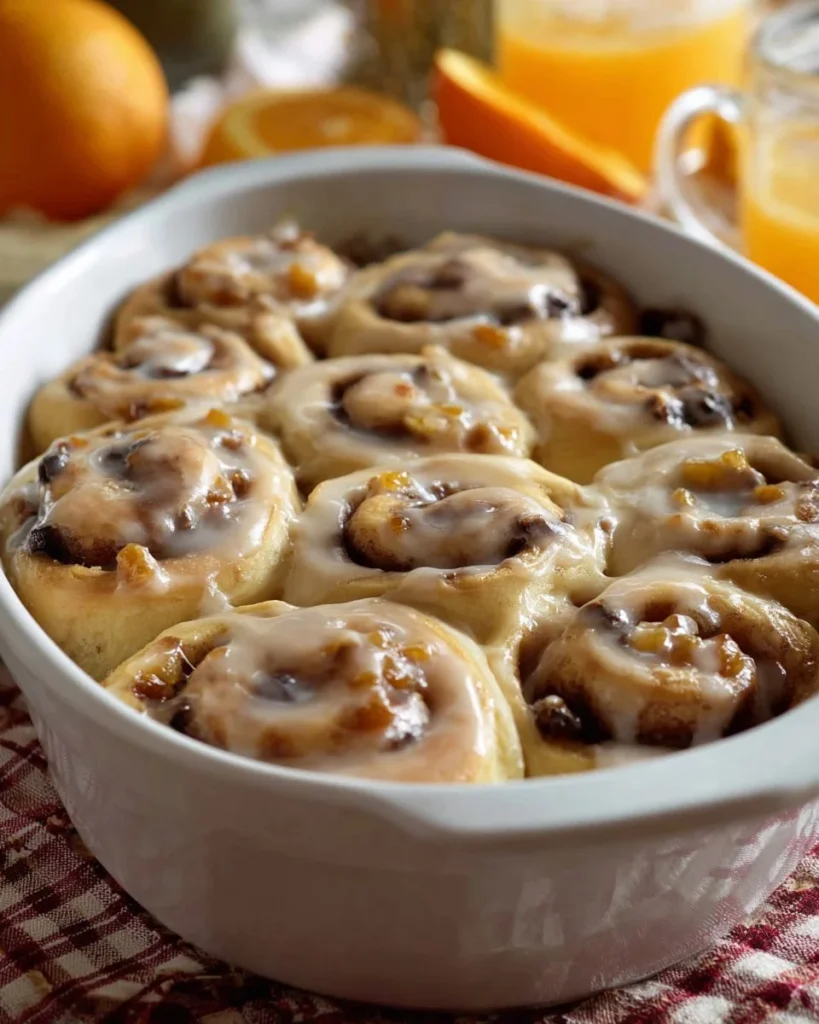
Imagine a warm, fragrant kitchen filled with the sweet aroma of freshly baked buns, perfectly mingled with the hints of spiced pears and raisins. These delightful treats make any gathering feel special, whether it’s a casual weekend brunch or a cozy holiday celebration. The combination of soft, fluffy dough with a luscious filling creates a symphony of textures, making each bite a comforting experience. These buns don’t just please the palate; they also create a feast for the eyes. With a golden-brown crust and a glossy glaze, they are irresistibly inviting. Whether you’re treating yourself or sharing with loved ones, these delightful pastries are sure to be a hit.
Why You’ll Love This Recipe
This recipe offers more than just delicious flavors; it combines the comforting aspects of homemade baking with the joy of using seasonal ingredients. The pears provide natural sweetness while keeping the buns moist, and the raisins add little bursts of joy that enhance every bite. Plus, this recipe is approachable for bakers of all skill levels, ensuring that anyone can enjoy the satisfaction of creating these scrumptious treats from scratch. With an easy-to-follow process, you’ll be amazed at how simple it is to make bakery-quality Chelsea buns right in your own kitchen!
What Makes This Recipe Special
What sets this recipe apart is the unique blend of flavors and textures that highlight the simplicity of the ingredients. By incorporating juicy pears and plump raisins, these buns elevate the classic Chelsea bun, making them a memorable treat. The use of fresh orange zest not only brightens the flavor profile but also adds a delightful aromatic note. The sweet apricot glaze perfectly complements the spiced filling, providing a shiny finish that makes them visually stunning. This recipe not only represents comfort but also creativity in the kitchen, allowing you to enjoy a seasonal twist on a beloved classic.
Ingredients
bread flour: Essential for structure, giving the buns their fluffy texture.
salt: Enhances flavor and helps control the fermentation process.
active dry yeast: Aids in leavening, creating a light and airy dough.
whole milk: Adds creaminess and enriches the dough’s flavor.
unsalted butter: Provides richness and moisture to the buns.
egg: Contributes to the dough’s structure and adds richness.
baking spray: Prevents the buns from sticking to the baking pan.
unsalted butter (filling): Used to create a luscious layer on the dough.
orange zest: Brightens the flavor with a fresh citrus note.
brown sugar: Provides sweetness and enhances the caramelization process.
ground cinnamon: Adds warmth and a cozy flavor component.
pears: Infuses the buns with juicy sweetness.
raisins: Offers bursts of chewy sweetness throughout the buns.
apricot jam: Creates a beautiful glaze for a glossy finish.
confectioners sugar: Used to make the sweet glaze that tops the buns.
orange zest (glaze): Adds a fresh element to the icing.
whole milk (glaze): Adjusts the consistency of the glaze for drizzling.
How to Make Chelsea Buns with Pears and Raisins
STEP 1. Combine dry ingredients. Add the flour, salt, and yeast to a large mixing bowl and whisk to combine.
STEP 2. Prepare milk and butter mixture. In a small saucepan, heat the milk and butter on low until the butter is melted.
STEP 3. Cool the mixture. Allow this milk and butter mixture to cool to about 110-120 degrees F.
STEP 4. Mix wet and dry ingredients. Pour the cooled mixture into the flour blend, then add the egg and stir until a soft dough forms.
STEP 5. Knead the dough. Transfer the dough to a lightly floured surface and knead for about five minutes.
STEP 6. Let the dough rise. Place the dough in a greased bowl, cover with plastic wrap, and set in a warm place to rise for one hour or until doubled in size.
STEP 7. Roll out the dough. Once doubled, place the dough on a lightly floured surface and roll into a 12×8-inch rectangle.
STEP 8. Prepare the filling. Brush the surface with melted butter, then sprinkle brown sugar, orange zest, and cinnamon, followed by the pears and raisins.
STEP 9. Roll the dough. Starting from the longer side, roll the dough tightly, trimming uneven ends if needed, then cut into 10 equal rolls.
STEP 10. Prepare the baking pan. Spray a large baking pan with baking spray and place the buns cut side up, spacing them appropriately.
STEP 11. Second rise. Cover the buns loosely with plastic wrap or a towel and let them rise in a warm area for about 30 minutes.
STEP 12. Preheat the oven. Preheat your oven to 350 degrees F while buns are rising.
STEP 13. Bake the buns. Place risen buns in the oven and bake for 20-25 minutes or until golden brown and fully baked.
STEP 14. Monitor doneness. If the buns are browning too quickly, cover with foil and continue baking.
STEP 15. Cool the buns. Remove from the oven and let cool for about 10 minutes.
STEP 16. Apply apricot glaze. Melt apricot jam in the microwave with a splash of water, then brush it onto the warm buns.
STEP 17. Prepare the icing. In a small bowl, whisk together confectioners sugar, orange zest, and enough milk to create a glaze.
STEP 18. Drizzle icing. Drizzle the icing over the cooled buns and serve.

Pro Tips
Achieving the perfect Chelsea buns involves a few helpful tips. First, always ensure that your yeast is fresh and active for optimal dough rising. When mixing the wet ingredients, let them cool enough before adding to the dry mixture to avoid killing the yeast. Kneading the dough properly helps develop gluten, giving the buns their desired texture. If you find the dough too sticky, lightly flour your hands while handling it. For an added aromatic touch, consider infusing the butter with a touch of vanilla or additional spices. Lastly, keep an eye on the baking time; every oven is different, and you’ll want them perfectly golden brown without becoming dry.
Common Mistakes to Avoid
When making Chelsea buns, there are a few common pitfalls to be mindful of. One common mistake is not allowing the dough to rise adequately; be patient, as this step is crucial for achieving fluffy buns. Another issue can arise from using too much flour when rolling the dough, resulting in dry buns. Ensure you only use what’s necessary to prevent stickiness. It’s also important to keep an eye on the oven, as the baking time can vary. Buns that are overbaked will become tough, while underbaked buns can be doughy in the middle. Lastly, don’t skip the glaze; it adds not only flavor but also an appealing finish to your finished product.
Variations
• Substitute apples for pears for a different fruity flavor.
• Use walnuts or pecans for a crunchy texture.
• Swap brown sugar for maple sugar for a unique sweetness.
• Try using cinnamon rolls dough for a quicker version.
• Add a pinch of nutmeg for extra warmth in the filling.
Serving Ideas
These delightful buns can be enjoyed in various ways, making them a versatile treat. Serve them warm with a side of butter for a cozy breakfast experience. Pair them with a cup of tea or coffee for an ideal afternoon snack. They also make a beautiful centerpiece for dessert tables, especially during holidays and special occasions. Considering their delightful flavors, these buns can be enjoyed as a sweet finish after dinner, adding an elegant touch to any meal.
Meal Prep & Storage
Preparing these buns in advance can save time and enhance your baking experience. You can make the dough the night before and let it rise in the fridge. When you’re ready to bake, allow it to come to room temperature before rolling and filling. These Chelsea buns are best consumed fresh, but they can be stored in an airtight container at room temperature for up to two days. If you’d like to extend their shelf life, consider freezing them. To freeze, allow cooled buns to be wrapped tightly in plastic wrap and aluminum foil for up to three months. Reheat them in the oven before serving for the best texture.
FAQs
Can I use whole wheat flour instead of bread flour?
While you can use whole wheat flour, it may change the texture and flavor of the buns. Adding a bit of vital wheat gluten can help achieve a fluffier result.
What if my dough doesn’t rise?
If your dough doesn’t rise, it might be due to inactive yeast. Always test your yeast before starting to ensure it’s fresh.
Can I make these buns vegan?
Yes! You can substitute non-dairy milk, vegan butter, and a flax egg to make a vegan version of these delicious buns.
How can I enhance the filling flavor?
Feel free to experiment by adding other spices like cardamom or cloves to the filling mixture for a delicious twist.
What’s the best way to store leftover buns?
Store leftovers in an airtight container at room temperature or freeze them to enjoy later. Just ensure they’re wrapped securely!
Conclusion
These delightful buns offer a sweet combination of flavor and comfort, perfect for whatever occasion you’re celebrating. Whether shared with family or savored solo, each bite promises a heartwarming taste of joy and indulgence. Enjoy crafting these delectable Chelsea buns!
Chelsea Buns with Pears and Raisins
Ingredients
Method
- Combine dry ingredients: Add the flour, salt, and yeast to a large mixing bowl and whisk to combine.
- Prepare milk and butter mixture: In a small saucepan, heat the milk and butter on low until the butter is melted.
- Cool the mixture: Allow this milk and butter mixture to cool to about 110-120 degrees F.
- Mix wet and dry ingredients: Pour the cooled mixture into the flour blend, then add the egg and stir until a soft dough forms.
- Knead the dough: Transfer the dough to a lightly floured surface and knead for about five minutes.
- Let the dough rise: Place the dough in a greased bowl, cover with plastic wrap, and set in a warm place to rise for one hour or until doubled in size.
- Roll out the dough: Once doubled, place the dough on a lightly floured surface and roll into a 12×8-inch rectangle.
- Prepare the filling: Brush the surface with melted butter, then sprinkle brown sugar, orange zest, and cinnamon, followed by the pears and raisins.
- Roll the dough: Starting from the longer side, roll the dough tightly, trimming uneven ends if needed, then cut into 10 equal rolls.
- Prepare the baking pan: Spray a large baking pan with baking spray and place the buns cut side up, spacing them appropriately.
- Second rise: Cover the buns loosely with plastic wrap or a towel and let them rise in a warm area for about 30 minutes.
- Preheat the oven: Preheat your oven to 350 degrees F while buns are rising.
- Bake the buns: Place risen buns in the oven and bake for 20-25 minutes or until golden brown and fully baked.
- Monitor doneness: If the buns are browning too quickly, cover with foil and continue baking.
- Cool the buns: Remove from the oven and let cool for about 10 minutes.
- Apply apricot glaze: Melt apricot jam in the microwave with a splash of water, then brush it onto the warm buns.
- Prepare the icing: In a small bowl, whisk together confectioners sugar, orange zest, and enough milk to create a glaze.
- Drizzle icing: Drizzle the icing over the cooled buns and serve.