
There’s nothing quite like the smooth, creamy indulgence of a classic cheesecake to brighten up any occasion. With each velvety slice, you’ll discover a harmonious blend of rich flavors that makes every bite truly satisfying. This recipe encapsulates all that makes cheesecake a beloved dessert, from its buttery crust to its soft, silky filling. Whether you’re celebrating a special birthday or simply treating yourself after a long day, this cheesecake is the ultimate comfort food.
The process is not only gratifying but also manageable for even the busiest of families. Picture this: you prepare the crust with an effortless combination of graham cracker crumbs and melted butter, then whisk together a heavenly filling that’s rich yet balanced. Chill it in the fridge, and you’ll have a stunning dessert ready to serve your loved ones, which they will surely rave about! Perfect for potlucks, holidays, or just an afternoon treat, this classic cheesecake is one recipe that deserves a spot in your kitchen.
Quick Answer
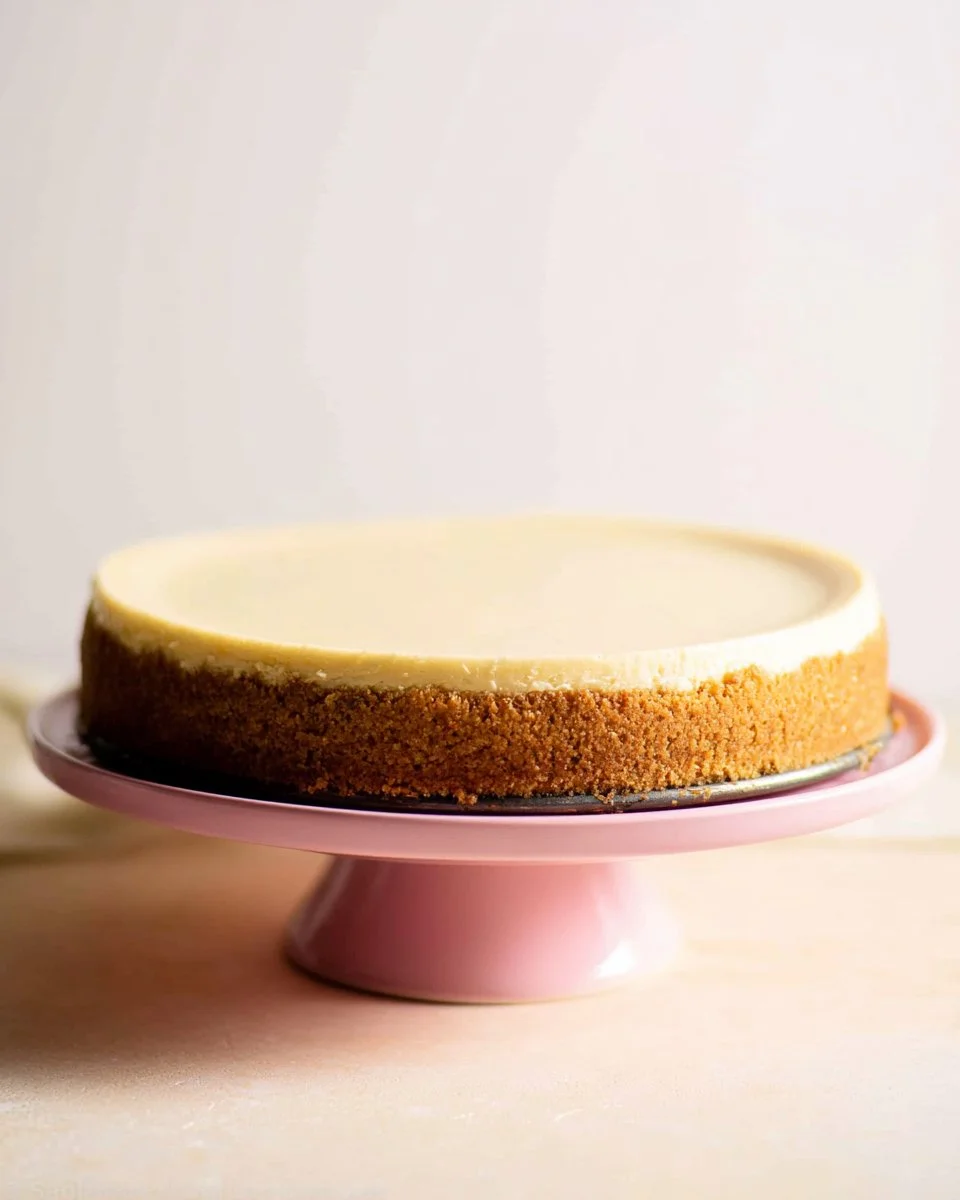
This classic cheesecake recipe features a buttery graham cracker crust and a creamy filling made from cream cheese, sugar, and sour cream. It’s a versatile dessert loved by many and perfect for various occasions, especially family gatherings and celebrations.
Why You’ll Love This Recipe
This cheesecake is not just any dessert; it’s an experience that combines delightful flavors with a stunning presentation. The creamy filling strikes the right balance of sweetness and richness, while the graham cracker crust adds a satisfying crunch. It’s a dish that brings everyone together, perfect for weeknight dinners or special celebrations.
- Easy to prepare even for novice cooks.
- Makes a great make-ahead dessert for effortless entertaining.
- Perfectly creamy and comforting.
- Deliciously versatile with endless topping possibilities.
- A family-favorite that caters to all age groups.
- Optional lemon juice brightens the flavor without overpowering.
What Makes This Recipe Special
This cheesecake stands out due to its perfectly balanced texture and flavor profile. The lightness of the filling, paired with the crispy graham cracker crust, creates a delightful contrast. The simplicity of the recipe makes it accessible while the taste will impress even the most discerning cheesecake aficionados. It captures the essence of home baking and comfort food, evoking happy memories with each slice.
Kitchen Tools You’ll Need
- Springform pan – Essential for removing the cheesecake effortlessly after baking.
- Food processor – Helpful for finely crushing graham crackers for the crust.
- Mixing bowl – To combine the cheesecake filling ingredients thoroughly.
- Measuring cups and spoons – For precise ingredient measurements.
- Spatula – For smoothing out the cheesecake batter.
- Roasting pan – Needed for the water bath to ensure even baking.
Ingredients
graham cracker crumbs: A foundational element creating a crunchy crust.
granulated sugar: Lightens the crust and adds sweetness.
unsalted butter: Binds the crust ingredients together while adding richness.
full-fat brick cream cheese: The star of the cheesecake, providing a creamy texture.
granulated sugar: Adds sweetness to the filling and balances the cream cheese’s tang.
full-fat sour cream: Adds creaminess and a tangy flavor to the filling.
pure vanilla extract: Enhances the overall flavor with a warm aroma.
fresh lemon juice: Brightens up the flavor profile (optional but recommended).
large eggs: Give structure and stability to the cheesecake.
Ready to cook? Scroll to the recipe card below for exact measurements.
How to Make Best Classic Cheesecake Recipe
Phase 1 – Prep
STEP 1. Preheat the oven. Adjust the oven rack to the lower-middle position and preheat oven to 350°F (177°C).
STEP 2. Prepare the crust. Use a food processor to grind graham crackers into fine crumbs, then mix with sugar and melted butter until sandy.
STEP 3. Form the crust. Pour mixture into an ungreased springform pan and pat down evenly to form a compact crust.
STEP 4. Bake the crust. Bake crust for 10 minutes, then remove from the oven and set aside.
STEP 5. Beat the filling. In a mixing bowl, beat cream cheese and sugar with a mixer until smooth and creamy, about 2 minutes.
STEP 6. Add remaining filling ingredients. Incorporate sour cream, vanilla, and optional lemon juice, then beat until fully combined.
STEP 7. Add eggs gradually. With the mixer on medium speed, add eggs one at a time, beating until just combined after each addition.
STEP 8. Prepare the water bath. Boil a pot of water, ensuring you have enough for a 1-inch water bath in your roasting pan.
Phase 2 – Cook
STEP 9. Wrap the pan. Wrap springform pan in aluminum foil to prevent water from seeping inside.
STEP 10. Assemble the cheesecake. Place the springform pan inside a larger roasting pan, pour the batter on top of the crust and smooth it out.
STEP 11. Add hot water. Carefully pour the hot water into the roasting pan and place it in the oven.
STEP 12. Bake the cheesecake. Bake for 55-70 minutes until the center is almost set but still slightly wobbly.
Phase 3 – Serve
STEP 13. Cool in the oven. Turn off the oven and leave the cheesecake in the water bath to cool for 1 hour with the door ajar.
STEP 14. Chill the cheesecake. Remove from the oven, discard foil, and let it cool completely at room temperature, then refrigerate for at least 4 hours.
STEP 15. Slice and serve. Run a knife around the edges to loosen, remove the outer rim, slice, and enjoy!
Why This Recipe Works
The charm of this cheesecake lies in its contrasting textures—a creamy filling that melts in your mouth against a crunchy crust that provides just the right amount of resistance. The combination of cream cheese, sugar, and eggs creates a custard-like density that’s enough to satisfy any dessert lover, while the optional lemon juice brightens the flavor, making each bite refreshing. Baking in a water bath ensures that the cheesecake cooks evenly, prevents cracks, and results in a smooth finish. It’s not just about what you make; it’s about the experience of creation and the joy it brings to those who enjoy it.
Pro Tips for Best Results
- Use room-temperature ingredients for a smoother batter.
- Don’t overmix after adding the eggs, as this can cause the cheesecake to crack.
- If the top starts to brown, tent it with foil halfway through baking.
- Allow the cheesecake to cool slowly in the oven to prevent sudden temperature changes.
- For the best flavor, let the cheesecake chill overnight before serving.
Common Mistakes to Avoid
Mistake:
Overmixing the batter.
Why it happens:
Many believe that more mixing leads to a better texture.
How to fix it:
Mix until just combined after adding eggs.
Mistake:
Not using a water bath.
Why it happens:
Some may skip this step for simplicity.
How to fix it:
Always use a water bath to avoid cracks.
Mistake:
Skipping the cooling step.
Why it happens:
Impatience to serve the dessert.
How to fix it:
Allow the cheesecake to cool in the oven before refrigerating.
Recipe Variations
- Add a fruit topping like strawberries or blueberries for freshness.
- Incorporate chocolate by adding cocoa powder to the batter.
- Use flavored extracts like almond for a unique twist.
- Swap the graham cracker crust for an Oreo crust for a chocolatey layer.
- Top with whipped cream and lemon zest for a bright finish.
Nutrition Highlights
| Nutrient | Amount |
|---|---|
| Protein | Varies based on ingredients, generally around 5g per serving. |
| Fiber | Minimal, primarily from the graham cracker crust. |
| Carbs | High due to sugar and crust ingredients. |
| Healthy Fats | Provided by cream cheese and butter. |
| Calories | Generally around 300-400 calories per slice. |
How to Serve Best Classic Cheesecake Recipe
- Pair with fresh berries for a fruity touch.
- Top with a drizzle of chocolate sauce for extra decadence.
- Add whipped cream for a creamy contrast.
- Serve alongside a hot cup of coffee for a delightful balance.
- Garnish with mint leaves for a pop of color.
Best Occasions for This Recipe
- Weeknight dinners when you need a sweet treat.
- Holidays like Thanksgiving or Christmas for a festive dessert.
- Meal prep for an easy dessert ready to go.
- Family gatherings where everyone enjoys a sweet finish.
- Potlucks to impress friends with your baking skills.
Make Ahead & Storage
Can This Be Meal Prepped
Yes, this cheesecake can be prepared a day in advance, making it perfect for gatherings.
Storing Leftovers
Store uneaten cheesecake in the fridge for up to four days, covered to maintain freshness.
Freezing
Cheesecake can be frozen for up to two months. Wrap tightly in plastic before placing in the freezer.
Reheating
Thaw in the refrigerator overnight. Enjoy cold or let sit at room temperature before serving.
Creative Ways to Use Leftovers
Leftover cheesecake can be transformed in delightful ways:
- Turn into cheesecake parfaits layered with fruit and granola.
- Make cheesecake bites coated with chocolate for a quick treat.
- Blend into smoothies for a creamy, dessert-inspired drink.
- Create cheesecake-stuffed pancakes for a special breakfast.
FAQs
How do I prevent my cheesecake from cracking?
Use a water bath during baking, mix gently, and allow it to cool slowly in the oven.
Can I use low-fat cream cheese?
While low-fat cream cheese can work, it may alter the cheesecake’s creaminess and flavor.
How long can I keep leftover cheesecake?
Leftover cheesecake can be stored in the refrigerator for up to four days.
Can I freeze cheesecake?
Yes, cheesecake freezes well. Just wrap it tightly to prevent freezer burn, and it will last up to two months.
What’s the best way to serve cheesecake?
Cheesecake is best served chilled, with optional toppings like fresh fruits, whipped cream, or chocolate sauce.
Save This Recipe for Later
If you enjoyed this recipe, consider saving it on Pinterest for later! Share it with friends and family to brighten their day with this classic dessert.
Final Thoughts
This classic cheesecake is a delightful way to celebrate any occasion. With its rich, creamy texture and buttery crust, it’s sure to be a hit at your family table. Whether you’re treating yourself or hosting friends, consider trying this recipe and savoring the delicious results. Don’t forget to explore related dessert recipes for more sweet inspiration!

Classic Cheesecake
Ingredients
Method
- Preheat the oven. Adjust the oven rack to the lower-middle position and preheat oven to 350°F (177°C).
- Prepare the crust. Use a food processor to grind graham crackers into fine crumbs, then mix with sugar and melted butter until sandy.
- Form the crust. Pour mixture into an ungreased springform pan and pat down evenly to form a compact crust.
- Bake the crust. Bake crust for 10 minutes, then remove from the oven and set aside.
- Beat the filling. In a mixing bowl, beat cream cheese and sugar with a mixer until smooth and creamy, about 2 minutes.
- Add remaining filling ingredients. Incorporate sour cream, vanilla, and optional lemon juice, then beat until fully combined.
- Add eggs gradually. With the mixer on medium speed, add eggs one at a time, beating until just combined after each addition.
- Prepare the water bath. Boil a pot of water, ensuring you have enough for a 1-inch water bath in your roasting pan.
- Wrap the pan. Wrap springform pan in aluminum foil to prevent water from seeping inside.
- Assemble the cheesecake. Place the springform pan inside a larger roasting pan, pour the batter on top of the crust and smooth it out.
- Add hot water. Carefully pour the hot water into the roasting pan and place it in the oven.
- Bake the cheesecake. Bake for 55-70 minutes until the center is almost set but still slightly wobbly.
- Cool in the oven. Turn off the oven and leave the cheesecake in the water bath to cool for 1 hour with the door ajar.
- Chill the cheesecake. Remove from the oven, discard foil, and let it cool completely at room temperature, then refrigerate for at least 4 hours.
- Slice and serve. Run a knife around the edges to loosen, remove the outer rim, slice, and enjoy!