
If you’re looking for the perfect comforting bread, homemade Dutch Oven Bread is it. This effortless recipe produces a rustic loaf with a crispy crust and airy interior, ideal for any meal or snack. Even if you’re new to baking, you’ll find this process approachable and rewarding. All you need are four simple ingredients, a bit of patience, and a Dutch oven to bake it in. The magic happens as the dough ferments and develops flavor, resulting in bread that rivals those found in artisanal bakeries. Plus, the aroma of fresh bread wafting through your kitchen is truly irresistible.
This Dutch Oven Bread recipe requires minimal hands-on time, yet the long resting period allows for deep flavor development. Whether you’re serving it alongside soup, slathered with butter, or simply enjoying a slice fresh out of the oven, you’ll quickly discover that this homemade bread is worth every minute. Gather your ingredients and let’s get started on crafting a loaf that will impress everyone at your table!
Quick Answer
This Dutch Oven Bread recipe is easy to follow and yields a beautifully crusty loaf. It involves just a few simple ingredients: flour, salt, yeast, and water. Perfect for beginners, with minimal effort for maximum flavor!
Why You’ll Love This Recipe
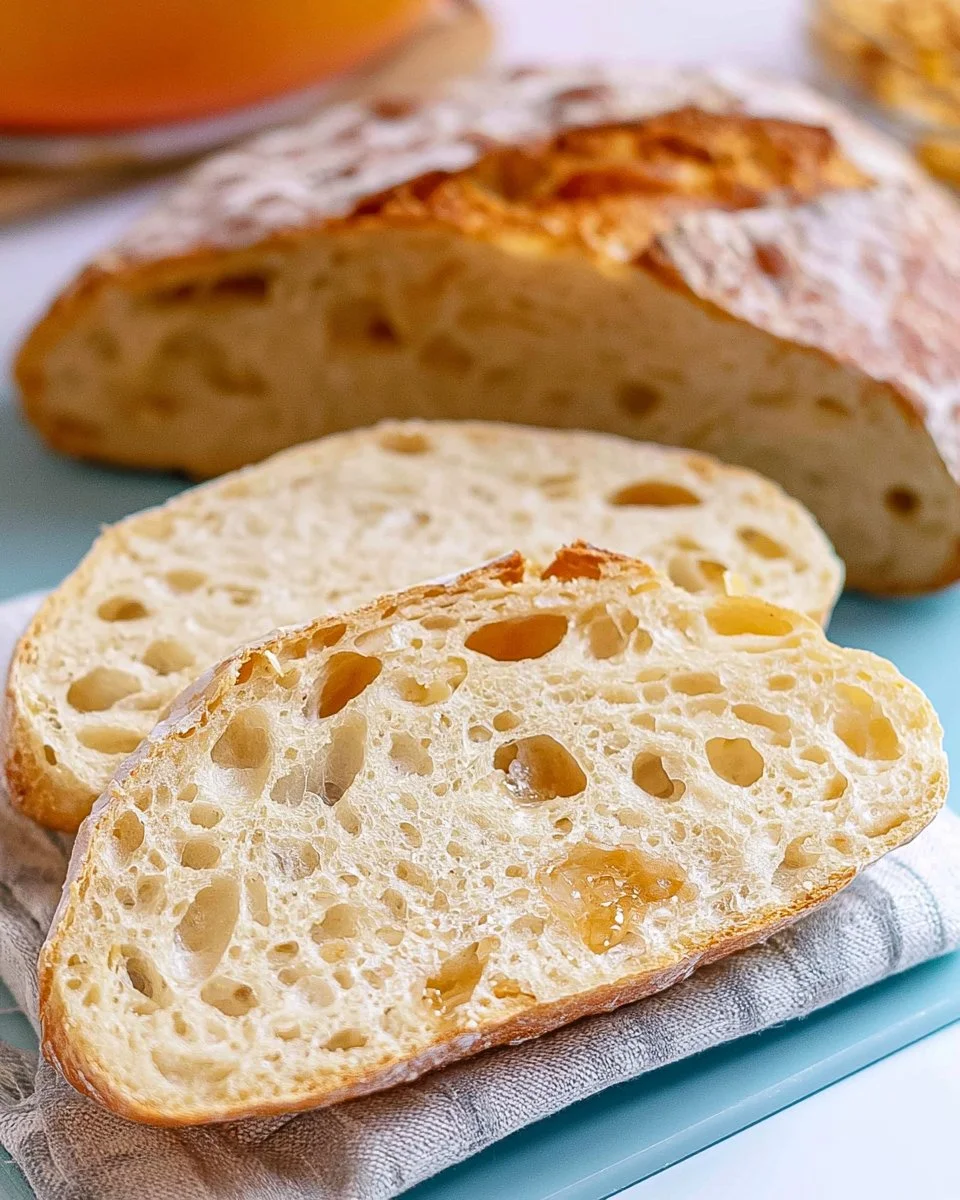
What sets this Dutch Oven Bread apart is not only its flavor but also its incredible texture. The high steam generated in a preheated Dutch oven creates a crust that is both crunchy and golden. Inside, the bread is soft and chewy, making it perfect for sandwiches or simply dipping into olive oil. Additionally, this recipe requires no kneading; the magic happens during an extended resting period. It’s a fantastic way to enjoy fresh, homemade bread without spending hours in the kitchen. Plus, the simplicity of the ingredients means you can whip up a loaf whenever the craving strikes!
What Makes This Recipe Special
This recipe shines due to its simplicity and the method involved. The overnight fermentation allows the yeast to develop a rich flavor and impeccable texture. The Dutch oven simulates a professional bread-baking environment by trapping steam, which is essential for achieving that desirable crust. You’ll also appreciate the versatility of the dough, which can be adapted with different herbs or cheese for added flavor. Cooking bread in a Dutch oven is a time-tested technique that results in superior bread texture and flavor, making this recipe a worthy addition to your baking repertoire.
Kitchen Tools You’ll Need
- Large bowl: For mixing the dough ingredients.
- Whisk: To combine the dry ingredients effectively.
- Dutch oven: Essential for creating that perfect crust.
- Parchment paper: Helps transfer the dough into the hot Dutch oven easily.
- Wire rack: For cooling the bread before slicing.
Ingredients
- All-purpose flour: The foundation of the dough, providing structure.
- Kosher salt: Enhances flavor and controls yeast activity.
- Instant dry yeast: Leverages fermentation for bread rise.
- Water: Hydrates the dough and activates the yeast.
How to Make Dutch Oven Bread
STEP 1. Mix dry ingredients. In a large bowl, whisk together the flour, salt, and yeast.
STEP 2. Add water. Add the water and stir to combine to form a shaggy, wet dough.
STEP 3. Rest the dough. Cover with plastic wrap and let sit for 12-18 hours.
STEP 4. Preheat the oven. Preheat the oven to 450 degrees F.
STEP 5. Heat the Dutch oven. Place a Dutch oven in the oven to heat for 30 minutes.
STEP 6. Shape the dough. On a floured surface, form the dough into a round shape and transfer it using parchment paper into the hot Dutch oven.
STEP 7. Bake covered. Cover and bake for 30 minutes, then uncover.
STEP 8. Bake uncovered. Bake another 10-15 minutes until golden brown.
STEP 9. Cool. Allow to cool on a wire rack before slicing.
Why This Recipe Works
This recipe’s success lies primarily in the use of the Dutch oven and the long fermentation period. The Dutch oven retains heat and moisture, creating an environment similar to a steam oven. As the bread bakes, steam develops and helps form that perfect crust while keeping the inside tender and moist. The no-knead method not only saves time but also allows the flavor to deepen as the dough rises slowly. This low-effort, high-reward approach makes it easy, even for novice bakers, to produce bakery-quality bread at home.
Pro Tips for Best Results
To ensure that your Dutch Oven Bread turns out perfectly every time, follow these pro tips. First, make sure your yeast is fresh; expired yeast can lead to suboptimal rising. Second, maintain an accurate measurement of ingredients; too much or too little flour can affect the dough’s consistency. Third, let the dough rest long enough to develop flavor; patience is key! Lastly, when transferring dough, be gentle to preserve the air bubbles that contribute to a light texture. If the bread seems dense, try baking it longer or adjusting the oven temperature for next time.
Common Mistakes to Avoid
A few common mistakes can hinder the success of your Dutch Oven Bread. One major error is not allowing the dough enough time to rise, which can lead to denser bread. Be sure to follow the resting period closely. Another mistake is not preheating the Dutch oven adequately; this is crucial for achieving that signature crust. Third, avoid adding too much flour while shaping; this can dry out the dough. Pay attention to the dough’s texture during the resting phase; it should be sticky but manageable. Lastly, avoid slicing the bread too soon; let it cool to enhance its texture and flavor.
Recipe Variations
While the classic Dutch Oven Bread is delicious on its own, experimenting with variations can take it to new heights. Consider adding herbs like rosemary or thyme for a flavorful twist. Incorporating cheese, such as shredded cheddar or finely grated Parmesan, creates a rich, savory loaf. For a sweeter option, fold in dried fruits like cranberries or apricots. Another delightful variation is replacing some all-purpose flour with whole wheat flour for added nutrition. Zest from citrus fruits can also be added for a refreshing aroma and taste.
Nutrition Highlights
| Nutrient | Amount per serving |
|---|---|
| Calories | 150 |
| Total Fat | 0.6g |
| Saturated Fat | 0.2g |
| Carbohydrates | 31g |
| Fiber | 1g |
| Sugar | 0g |
| Protein | 5g |
How to Serve Dutch Oven Bread
Dutch Oven Bread is incredibly versatile and lends itself well to a variety of serving options. You can slice it thick or thin, depending on your preference. Serve it warm with a generous pat of butter for a comforting treat, or use it to create gourmet sandwiches filled with your favorite ingredients. Dipping the bread into olive oil, balsamic vinegar, or bruschetta offers a delightful appetizer. Additionally, this bread pairs beautifully with soups and stews, making it an excellent accompaniment for hearty meals. Don’t hesitate to get creative!
Best Occasions for This Recipe
This homemade Dutch Oven Bread is perfect for an array of occasions. It’s an ideal addition to family dinners, holiday gatherings, or casual get-togethers with friends. Serve it during brunch alongside fresh jams or as a base for bruschetta at parties. Its rustic charm makes it suitable for both formal and informal occasions alike. Additionally, sharing a freshly baked loaf can become a great way to show love and hospitality, making it a wonderful gift for neighbors or loved ones. Bake a batch for your next gathering, and watch it disappear!
Make Ahead & Storage
For those who like to plan, this recipe allows you to make the dough ahead of time! Simply prepare the dough and let it sit in the fridge for up to three days, allowing for flavor development. Just remember to bring it back to room temperature before baking it. The bread itself is best enjoyed fresh, but leftovers can be kept for future meals.
Meal Prep
Prepare the dough up to three days in advance and store it in the refrigerator, covered with plastic wrap. The longer it sits, the more flavorful it will become. When ready to bake, allow the dough to come to room temperature before baking.
Refrigeration
Store leftover bread wrapped in foil or in an airtight container at room temperature for up to three days. For longer preservation, slice it and store in the refrigerator, though freshness is best when kept at room temperature.
Freezing
If you want to extend the life of your bread, freezing is a great option. Wrap the cooled bread tightly in plastic wrap and foil, then place in a freezer bag. Properly stored, it can last up to three months. For best results, slice before freezing to easily grab a piece when needed.
Reheating
To reheat frozen bread, let it thaw overnight in the refrigerator. Then, pop it in a 350-degree F oven for about 10 minutes to restore its original crustiness. For sliced bread, toasting it can also enhance flavor while enjoying it fresh.

FAQs
Can I use bread flour instead of all-purpose flour? Yes, bread flour can be used for a slightly denser and chewier texture due to its higher protein content.
What if I can’t find instant dry yeast? You can substitute active dry yeast, but it requires proofing in warm water beforehand.
How do I know my bread is done? The bread should be golden brown, and tapping the bottom should produce a hollow sound, indicating it’s fully baked.
Can I add seeds or nuts to the dough? Absolutely! Fold in your choice of seeds or nuts for added texture and flavor.
What should I do if my dough is too sticky? If the dough feels excessively sticky, you can lightly dust it with flour while shaping but avoid over-flouring, which can affect the final texture.
Save This Recipe for Later
If you enjoyed this Dutch Oven Bread recipe, don’t forget to bookmark it for future baking adventures! Share it with friends and family who appreciate the joy of homemade bread!
Final Thoughts
Baking Dutch Oven Bread is more than just following a recipe; it’s about embracing the art of bread-making. With simple ingredients and a straightforward process, this recipe empowers even novice bakers to create a delightful loaf. Enjoy the rewards of your efforts not just in the delicious bread you bake, but in the warmth it brings to your home.

Dutch Oven Bread
Ingredients
Method
- In a large bowl, whisk together the flour, salt, and yeast.
- Add the water and stir to combine to form a shaggy, wet dough.
- Cover with plastic wrap and let sit for 12-18 hours.
- Preheat the oven to 450 degrees F.
- Place a Dutch oven in the oven to heat for 30 minutes.
- On a floured surface, form the dough into a round shape and transfer it using parchment paper into the hot Dutch oven.
- Cover and bake for 30 minutes, then uncover.
- Bake another 10-15 minutes until golden brown.
- Allow to cool on a wire rack before slicing.