

If you’re looking to impress at your next gathering or simply treat yourself to a decadent dessert, this Red Velvet Cheesecake Recipe is a must-try. With its rich, velvety flavor and creamy texture, it brings together the classic charm of red velvet with the indulgence of cheesecake. Perfectly suited for celebrations, it’s a show-stopping dessert that will leave everyone asking for seconds. Plus, this recipe is not just about look and taste; it’s also incredibly versatile, making it a great choice for meal planning or family dinners.
Why You’ll Love This Red Velvet Cheesecake
This Red Velvet Cheesecake is worth making because it combines the best of both worlds: a classic, beloved flavor with the luxurious texture of cheesecake. You’ll find that it’s a delightful crowd-pleaser, perfect for special occasions or a cozy night in.
- Flavor Profile: The luscious blend of tangy cream cheese and sweet red velvet is irresistible.
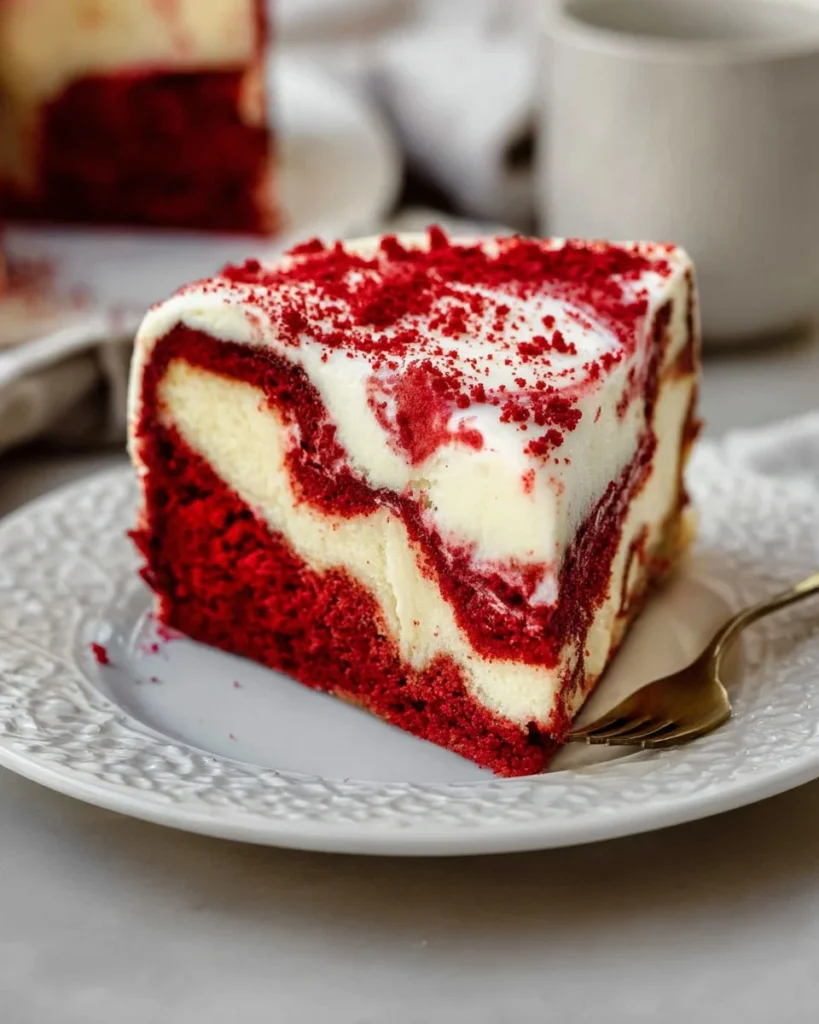
- Texture: It provides a creamy cheesecake layer atop a moist, cake-like base, creating a delightful contrast.
- Meal Prep Value: This cheesecake can be made ahead of time, making entertaining stress-free.
- Health Benefits: With thoughtful ingredient choices, you can tailor this recipe to suit dietary needs.
- Convenience: Simple ingredients come together in a way that feels indulgent without the fuss.
- Family Appeal: It’s a dessert that kids and adults alike will enjoy, making it perfect for family gatherings.
Ingredients for Red Velvet Cheesecake
- Red Velvet Cake Mix – creates the signature flavor and color.
- Cream Cheese – adds creaminess and rich flavor.
- Sour Cream – enhances texture and tanginess.
- Granulated Sugar – provides sweetness and balances flavors.
- Eggs – helps bind ingredients and give structure to the cheesecake.
- Vanilla Extract – infuses a warm, sweet aroma.
- Cocoa Powder – deepens the chocolate notes in the red velvet flavor.
Ready to cook? Scroll to the recipe card below for exact measurements.
How to Make Red Velvet Cheesecake
- Preheat your oven to 325°F (163°C).
- In a large bowl, combine the red velvet cake mix, eggs, and oil until smooth.
- In a separate bowl, blend the cream cheese, sour cream, sugar, and vanilla until creamy.
- Layer half of the red velvet batter into a greased springform pan.
- Spoon the cream cheese mixture over the red velvet batter, spreading evenly.
- Top with the remaining red velvet batter, spreading it gently over the cheesecake layer.
- Bake for 50-60 minutes, or until the center is set but slightly jiggly.
- Let it cool for at least 2 hours before removing from the pan.
- Chill in the refrigerator for an additional minimum of 4 hours before serving.
Pro Tips for Best Results
- For a more intense flavor, use buttermilk instead of water when preparing the cake mix.
- Substitute Greek yogurt for sour cream for a lighter texture and added protein.
- Mix in chocolate chips into the cheesecake layer for an extra chocolatey surprise.
- If you’re short on time, use store-bought red velvet cake mix to save on prep.
- Ensure your cream cheese is at room temperature for an ultra-smooth filling.
Common Mistakes to Avoid
Below are some common pitfalls when making Red Velvet Cheesecake and how to avoid them:
- Overmixing the batter: This can lead to a tough texture. Mix just until combined.
- Using cold ingredients: Cold cream cheese can create lumps. Always let it come to room temperature.
- Not cooling properly: Allowing it to cool too quickly can cause cracks. Let it cool slowly in the oven with the door slightly ajar.
Recipe Variations
- Gluten-Free: Use a gluten-free cake mix for a gluten-free version.
- Dairy-Free: Substitute cream cheese with a dairy-free alternative and use non-dairy sour cream.
- Spicy Version: Add a pinch of cayenne pepper for a subtle kick.
- Herb-Forward Version: Incorporate a hint of mint extract for a refreshing flavor.
- Air Fryer Adaptation: Cook it in an air fryer at 300°F (149°C) for 30-40 minutes.
How to Serve Red Velvet Cheesecake
- Best Pairings: Serve with a dollop of whipped cream or a scoop of vanilla ice cream.
- Toppings: Fresh strawberries or raspberries on top for a pop of color.
- Garnishes: Drizzle with cream cheese glaze or chocolate sauce for an elegant finish.
Make Ahead & Storage
Can This Be Meal Prepped
Absolutely! This cheesecake can be made up to two days in advance for optimal flavor.
Storing Leftovers
Store any leftovers in an airtight container in the refrigerator for up to 5 days.
Freezing
You can freeze this cheesecake for up to 3 months. Wrap it tightly in plastic wrap and foil before freezing.
Reheating
Thaw in the refrigerator overnight. For best texture, enjoy chilled rather than reheated.
FAQs

Can I make Red Velvet Cheesecake ahead of time? Yes, it’s perfect for making ahead, just store it in the fridge for freshness.
What can I use instead of eggs? You can use flaxseed meal mixed with water or commercial egg substitutes.
Is Red Velvet Cheesecake gluten-free? Use a gluten-free cake mix to make it suitable for gluten intolerances.
How do I know when the cheesecake is done? It should be slightly jiggly in the center; it will firm up as it cools.
This Red Velvet Cheesecake Recipe is the ultimate treat that combines flavors and textures for a delightful dessert experience. Give it a try, and you won’t be disappointed! For more fantastic recipes, explore our collection that celebrates the joy of cooking and sharing delicious food.
Red Velvet Cheesecake
Ingredients
Method
- Preheat your oven to 325°F (163°C).
- In a large bowl, combine the red velvet cake mix, eggs, and oil until smooth.
- In a separate bowl, blend the cream cheese, sour cream, sugar, and vanilla until creamy.
- Layer half of the red velvet batter into a greased springform pan.
- Spoon the cream cheese mixture over the red velvet batter, spreading evenly.
- Top with the remaining red velvet batter, spreading it gently over the cheesecake layer.
- Bake for 50-60 minutes, or until the center is set but slightly jiggly.
- Let it cool for at least 2 hours before removing from the pan.
- Chill in the refrigerator for an additional minimum of 4 hours before serving.