
There’s something incredibly heartwarming about the aroma of freshly baked bread wafting through your home. It stirs memories of family gatherings and creates a soothing backdrop for any occasion. This particular artisan bread strikes the perfect balance between a crispy crust and a soft, chewy interior, making it the ultimate comfort food. Whether you’re preparing a cozy dinner for your loved ones or looking for an impressive dish to share at a potluck, this bread is sure to be a crowd-pleaser. Plus, it’s a time-efficient option for busy families and meal-preppers alike, requiring minimal active cooking time and offering maximum flavor. Just imagine the satisfaction of serving up warm, homemade bread with dinner—it’s an experience that elevates any meal.
Quick Answer
This Easy Artisan Bread recipe is a hands-off approach to creating bakery-quality bread at home. It’s perfect for busy families or anyone looking to impress guests with minimal effort. You’ll love the crusty exterior and soft, airy inside!
Why You’ll Love This Recipe
This recipe offers a delightful way to enjoy fresh bread, with a crispy crust that cracks gently under your hands and a warm, fluffy interior that begs to be slathered with butter or used for sandwiches. It’s not just about taste; the practical convenience of making artisan bread at home is unbeatable.
- Flavor Profile: Enjoy a rich, nutty flavor from the whole wheat and a classic taste from the all-purpose flour.
- Texture: A satisfying crunch on the outside with a soft, airy crumb inside.
- Convenience: This recipe allows for preparation ahead of time and easy storage, making it suitable for any schedule.
- Meal Prep Value: Its versatility allows it to be enjoyed with various meals, from soups to salads.
- Family Appeal: Great for all ages, perfect for sandwiches and snacks.
What Makes This Recipe Special
The charm of this artisan bread lies in its simplicity. With just a handful of accessible ingredients, you can create something that feels indulgent and sophisticated. The slow fermentation process enhances the flavors, yielding a more complex and satisfying taste while ensuring an ideal texture. Each bite offers a comforting experience that welcomes a range of accompaniments, making it a versatile addition to any table.
Kitchen Tools You’ll Need
- Large Bowl – Necessary for mixing and letting the dough rise.
- Dutch Oven – Essential for baking and achieving a crispy crust.
- Parchment Paper – Helps in transferring the dough and prevents sticking.
- Serrated Knife – Perfect for slashing the top of the dough for that beautiful artisan look.
- Mixing Utensil – Helpful for mixing the dough until combined.
Ingredients
warm water: Activates the yeast and helps the dough rise.
yeast: Essential for fermentation; both instant and active dry work well.
salt: Enhances flavor and controls yeast activity.
whole wheat flour: Adds a nutty flavor and hearty texture.
unbleached all-purpose flour: Provides structure and tenderness to the bread.
Ready to cook? Scroll to the recipe card below for exact measurements.
How to Make Easy Artisan Bread Recipe
STEP 1. Mix the Yeast and Salt. Put the yeast and salt in a bowl and add the water.
STEP 2. Add the Flour. Add all the flour and mix until combined. Then mix at a higher speed for 30 seconds to 1 minute.
STEP 3. Knead the Dough. You can knead by hand for one minute or perform a series of stretches and folds while it rises.
STEP 4. First Rise. Place in a LARGE bowl and cover with plastic or another non-porous cover (not airtight). Let set at room temperature for about 1½ hours until it doubles in size.
STEP 5. Refrigerate or Bake Immediately. You can refrigerate for up to a week and a half or bake right away.
STEP 6. Prepare to Bake. If baking immediately, cut off what you need, shape, and let it sit while the Dutch oven heats.
STEP 7. Preheat the Oven. Place an enameled Dutch oven, with lid, in a 450°F oven.
STEP 8. Shape the Dough. Dust the dough with flour, grab half the dough, and cut it off with a serrated knife. Shape gently into a ball and place on parchment paper.
STEP 9. Let it Rest. Dust the top with more flour and let sit for 30 minutes if baking the same day, or 1 hour if the dough was refrigerated.
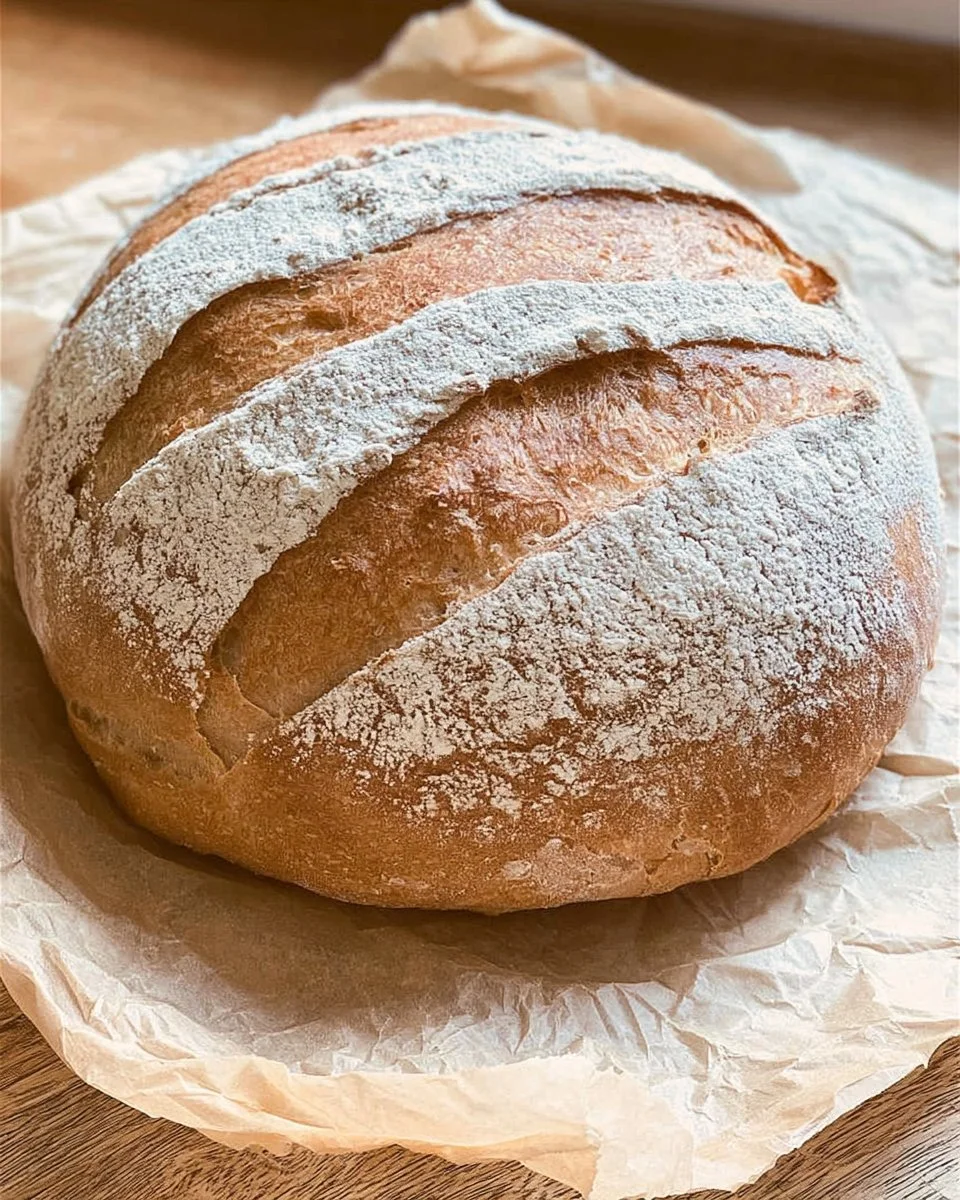
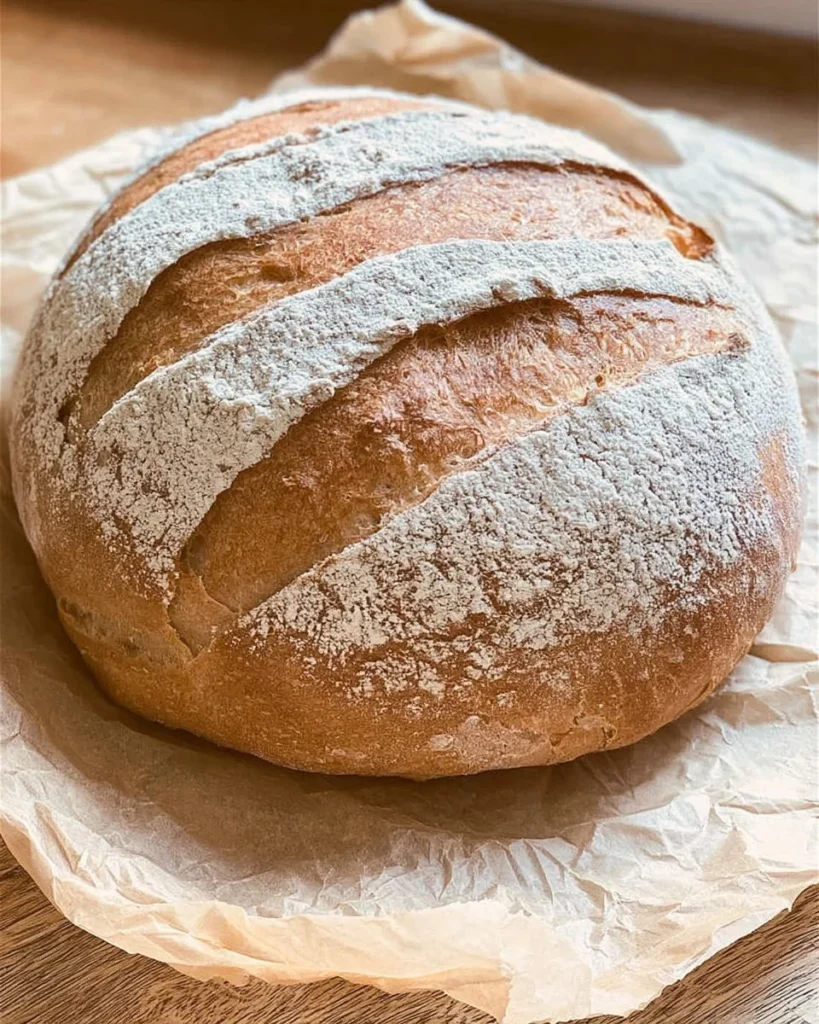
STEP 10. Slash the Top. Using a serrated knife, make a slash on the top of the loaf.
STEP 11. Bake the Loaf. Transfer the loaf to the hot Dutch oven using the edges of the parchment, replace the lid, and cook for 15 to 17 minutes.
STEP 12. Finish Baking. Remove the lid and continue to cook for another 15 to 17 minutes until the loaf is golden brown.
STEP 13. Cool. Remove to a cooling rack for 30 to 60 minutes before cutting.
Why This Recipe Works
The texture of this bread is a study in contrasts. The crust becomes incredibly crispy due to the steam trapped inside the Dutch oven during baking. This contrasts beautifully with the soft, airy crumb that results from careful dough handling and the unique blending of whole wheat and all-purpose flours. The simple ingredients work together seamlessly, and the method allows for flexibility in timing without sacrificing taste. Additionally, the slow fermentation process helps develop deeper flavors, making each loaf unique.
Pro Tips for Best Results
- For a deeper flavor, consider letting the dough rise in the refrigerator overnight.
- Use a baking stone if you don’t have a Dutch oven; it will also create a great crust.
- Don’t skip the slashing step; it allows the bread to expand beautifully as it bakes.
- Add herbs or garlic to the dough for additional flavor boosts.
- If the bread feels too dense, ensure the yeast is fresh; expired yeast can hinder the rise.
Common Mistakes to Avoid
Mistake: Using cold water.
Why it happens: Cold water can prevent proper yeast activation.
How to fix it: Always use warm water for best results.
Mistake: Skipping the first rise time.
Why it happens: Impatience can lead to dense bread.
How to fix it: Allow the dough to rise until it’s doubled in size.
Mistake: Not preheating the Dutch oven.
Why it happens: A cold pot can lead to a poor crust.
How to fix it: Always preheat your Dutch oven adequately.
Mistake: Cutting into the bread too early.
Why it happens: It’s tempting to dig in, but it needs to cool.
How to fix it: Wait at least 30 minutes before cutting.
Recipe Variations
- Add seeds: Incorporate sesame, sunflower, or poppy seeds for texture and flavor.
- Include herbs: Fresh rosemary or thyme can enhance the taste wonderfully.
- Try cheese: Incorporate shredded cheese for a savory twist.
- Make garlic bread: Add minced garlic to the dough for a flavorful variation.
- Create whole-grain versions: Use spelt or rye flour instead of whole wheat.
Nutrition Highlights
| Nutrient | Per Serving |
|---|---|
| Protein | Varies based on flour |
| Fiber | Whole wheat contributes to dietary fiber |
| Carbs | Provides energy from whole grain sources |
| Healthy Fats | Minimal, ideal for low-fat diets |
| Calories | Depends on serving size; great for calorie-conscious eating |
How to Serve Easy Artisan Bread Recipe
- Pair with soup: Perfect for dipping into hearty soups.
- Top with butter: A simple spread that enhances the bread’s flavor.
- Create sandwiches: Use for fresh sandwiches filled with meats, cheeses, or vegetables.
- Enjoy with cheese platters: Accompany with a selection of cheeses and olives.
- Serve with olive oil: Drizzle with balsamic or herbs for a dipping experience.
Best Occasions for This Recipe
- Weeknight dinners when comfort is key.
- Holidays, to impress family and friends.
- Meal prep for quick lunches throughout the week.
- Family gatherings, offering a homemade touch.
- Potlucks, to share something delightful.
Make Ahead & Storage
Can This Be Meal Prepped
Yes, the dough can be prepped ahead of time and refrigerated for up to a week and a half, allowing you to bake fresh bread whenever you desire.
Storing Leftovers
Store any leftover bread in a plastic bag or airtight container at room temperature for three to four days to retain its freshness.
Freezing
All bread freezes well. Wrap tightly in plastic and then in foil, or use a freezer-safe container. It can be frozen for up to three months.
Reheating
To reheat, wrap bread in foil and warm it in a 350°F oven for about 15-20 minutes, or until heated through.
Creative Ways to Use Leftovers
Transform stale bread into:
- Wraps: Fill with deli meats and veggies for a quick meal.
- Bowls: Use as a base for soup or salad.
- Sandwiches: Craft hearty sandwiches with your favorite fillings.
- Lunch Boxes: Cut into perfect portions for kids’ lunches.
FAQs
Can I use bread flour instead of all-purpose flour?
Yes, using bread flour will yield a chewier texture due to its higher protein content.
How long does it take to rise?
The dough typically requires about 1½ hours at room temperature to double in size.
Can I add spices to the dough?
Absolutely! Consider herbs, garlic powder, or spices for different flavor profiles.
How do I know when the bread is done baking?
The bread should be golden brown and sound hollow when tapped on the bottom.
Can I let the dough rise overnight?
Yes, refrigerating the dough overnight enhances flavor and can make for a convenient bake the next day.
Save This Recipe for Later
If you enjoyed this artisan bread recipe, please save it to your Pinterest board or bookmark it for later! Sharing with friends who love homemade baking is also a great way to enjoy the comfort of baking together.
Final Thoughts
Homemade bread is one of life’s great pleasures, and this recipe embodies that simplicity and joy. With its crunchy crust and tender crumb, it’s perfect for sharing at any mealtime. Try this recipe and experience the satisfaction of baking your own bread. Don’t forget to explore other related recipes for an even more delightful cooking adventure!
Artisan Bread
Ingredients
Method
- Mix the yeast and salt in a bowl and add the warm water.
- Add all the flour and mix until combined. Then mix at a higher speed for 30 seconds to 1 minute.
- Knead the dough by hand for one minute or perform a series of stretches and folds while it rises.
- Place in a LARGE bowl and cover with plastic or another non-porous cover (not airtight). Let set at room temperature for about 90 minutes until it doubles in size.
- You can refrigerate the dough for up to a week and a half or bake right away.
- Preheat the oven to 450°F with an enameled Dutch oven inside.
- Dust the dough with flour, grab half the dough, and cut it off with a serrated knife. Shape gently into a ball and place on parchment paper.
- Let it rest, dusted with flour, for 30 minutes if baking the same day, or 1 hour if the dough was refrigerated.
- Slash the top of the loaf with a serrated knife.
- Transfer the loaf to the hot Dutch oven using the edges of the parchment, replace the lid, and cook for 15 to 17 minutes.
- Remove the lid and continue to cook for another 15 to 17 minutes until the loaf is golden brown.
- Remove to a cooling rack for 30 to 60 minutes before cutting.