

There’s something uniquely satisfying about opening a crispy jar of dill pickles, especially when you know they were made from scratch. These delightful bites provide an irresistible crunch and zest that can elevate sandwiches, burgers, or even serve as a standalone snack. Making your own pickles not only ensures fresher flavors but also allows you to control the ingredients, making them a healthier option for your family.
Canning dill pickles can be a rewarding experience, perfect for busy families looking to store summer’s bounty for colder months. Whether you’re planning a family barbecue or a picnic in the park, these homemade delights are sure to impress. With just a few fresh ingredients and a little time, you can create jars full of tangy goodness that will be the talk of your next gathering.
Quick Answer
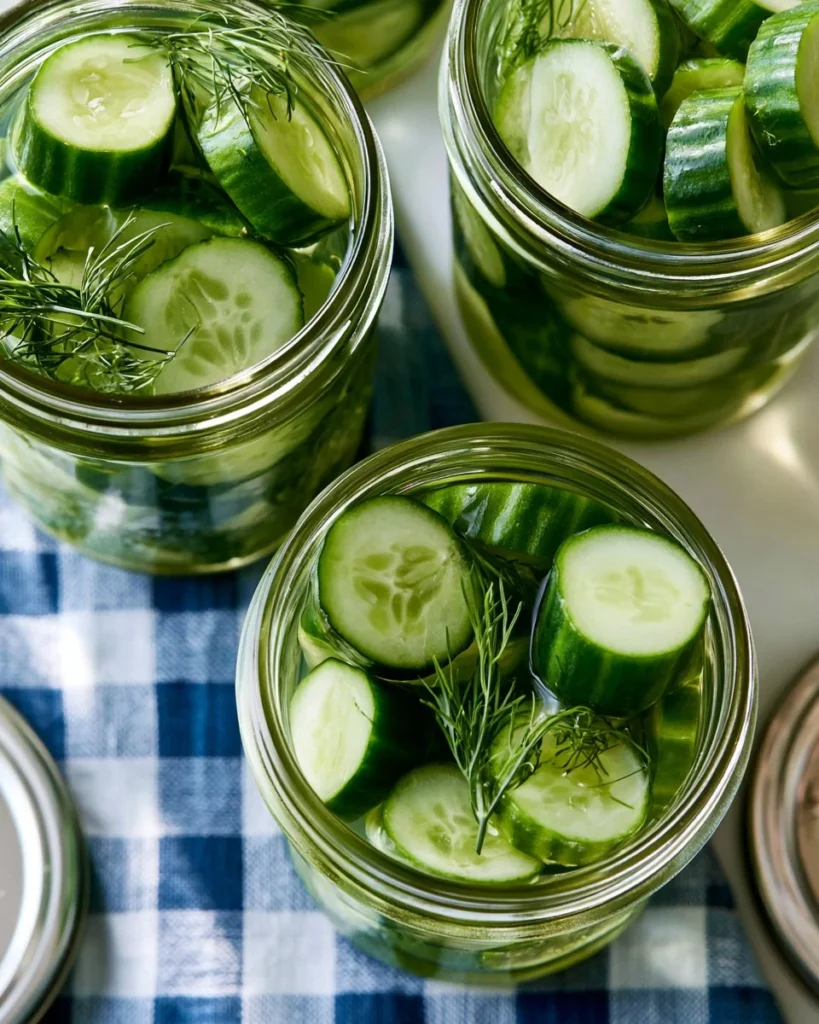
Easy Dill Pickles for Canning are fresh cucumbers pickled with garlic, dill, and vinegar. They’re popular for their crunchy texture and zesty flavor, making them a favorite on sandwiches and as snacks. This recipe is great for anyone looking to preserve cucumbers and enjoy homemade pickles.
Why You’ll Love This Recipe
This recipe captures the essence of what makes pickles so cherished. The fresh crunch of garden cucumbers combined with the aromatic dill and garlic creates a delightful flavor explosion. Not only are these pickles full of robust taste, but they are also simple to prepare, making them an ideal choice for quick meal prep or family-friendly activities.
- Flavorful balance: The tangy vinegar complements the fragrant dill perfectly.
- Textural delight: Crisp cucumbers create a satisfying crunch in every bite.
- Convenient canning: Preserve these pickles for up to a year.
- Meal prep friendly: A great addition to salads, sandwiches, or as snacks.
- Family appeal: Fun for kids to help prepare and enjoy eating.
What Makes This Recipe Special
This easy dill pickle recipe stands out due to its straightforward approach and the quality of ingredients. Using fresh cucumbers and aromatic herbs, it strikes the perfect balance between tangy and savory, inviting you back for more. The act of canning itself adds a level of satisfaction, allowing you to enjoy the fruits of your labor months down the line. These pickles not only store well but continue to develop their flavor the longer they sit, making them a go-to for any occasion.
Kitchen Tools You’ll Need
- Canning jars – Essential for storing your homemade pickles safely.
- Canning rack – Helps keep jars submerged in boiling water during processing.
- Jar lifter – Safely removes hot jars from boiling water.
- Large pot – For boiling water and processing the jars.
- Liquid measuring cup – To accurately pour the vinegar mixture.
Ingredients
pickling or English cucumbers: Fresh variations are perfect for crunch.
dill weed: Provides that classic dill flavor.
garlic: Adds a savory depth to the pickles.
calcium chloride granules: Optional for crispiness.
water: Used to create the brine mixture.
apple cider vinegar or white distilled vinegar: Adds necessary acidity for preservation.
pickling salt: Ensures a proper brine without impurities.
Ready to cook? Scroll to the recipe card below for exact measurements.
How to Make Easy Dill Pickles for Canning
STEP 1. Prepare the pot. Bring a very large pot of water to a boil and place a canning rack or round cooling rack in the pot.
STEP 2. Sterilize jars. Wash jars in soapy hot water, then sterilize in boiling water for 5 minutes and let dry.
STEP 3. Prepare cucumbers. Peel the cucumbers if desired and slice them into 1/8 to 1/4-inch thick slices or 4 spears.
STEP 4. Pack the jars. Place one bunch of dill and 1 to 2 halves of garlic cloves in each jar. Pack the cucumber slices or spears firmly, leaving 1/2 inch of headspace at the top.
STEP 5. Add calcium chloride. Sprinkle 1/8 teaspoon of calcium chloride granules into each half-pint jar.
STEP 6. Make the brine. In a large saucepan, combine water, vinegar, and pickling salt. Bring to a boil over medium heat, stirring often.
STEP 7. Fill the jars. Pour the boiling vinegar mixture over the cucumbers, leaving a 1-inch headspace at the top of the jar.
STEP 8. Seal the jars. Add the lids and twist on the jar bands until they are fingertip-tight.
STEP 9. Water bath canning. Lower the jars into the boiling water, ensuring there is 1 inch of water above the jars. Boil for 10 minutes for half-pint and pint jars, or 15 minutes for quart jars.
STEP 10. Cool the jars. Carefully remove the jars with the jar lifter and let them cool completely on a clean surface.
STEP 11. Enjoy your pickles. Pickles will be ready to eat in 24 hours but taste even better after 3 days. Store in the refrigerator for up to 2-3 weeks, or in a cool, dark place for up to 1 year.
Why This Recipe Works
This dill pickle recipe excels due to its effective layering of flavors and textures. The combination of vinegar and pickling salt creates a tangy brine that penetrates the cucumbers, ensuring they absorb those delicious flavors. The crunchiness of the cucumbers holds up beautifully during the canning process, providing that satisfying bite. Additionally, the simplicity of the recipe means you can whip up a batch quickly, putting homemade pickles on the table with little fuss.
Pro Tips for Best Results
For optimal results when making these dill pickles, consider the following tips:
- Use fresh, firm cucumbers for the best texture.
- Add a pinch of red pepper flakes for a spicy kick.
- Vary the garlic cloves – feel free to add more for a stronger flavor.
- For extra flavor, let your pickles sit for at least a few days before consuming.
- Make sure your water bath covers the jars completely for even processing.
Common Mistakes to Avoid
Mistake: Not sterilizing the jars properly.
Why it happens: Skipping this step can lead to spoilage.
How to fix it: Always ensure jars are cleaned and sterilized before use.
Mistake: Overfilling the jars.
Why it happens: Not leaving enough headspace can cause brine overflow.
How to fix it: Maintain a 1-inch headspace at the top of each jar.
Mistake: Not boiling the jars long enough.
Why it happens: Inadequate processing can result in unsafe preservation.
How to fix it: Follow the recommended boiling times based on jar size.
Mistake: Using the wrong type of salt.
Why it happens: Regular table salt contains additives that affect brining.
How to fix it: Always use pickling salt for best results.
Recipe Variations
- Add spices like mustard seeds or peppercorns for extra flavor.
- Include sliced onions for a sweet and tangy twist.
- Try adding a splash of citrus juice for brightness.
- Experiment with different herbs like thyme or oregano.
- Make a smaller batch with fewer jars to try new combinations.
Nutrition Highlights
| Nutrient | Amount per Serving |
|---|---|
| Protein | 1g |
| Fiber | 1g |
| Carbohydrates | 2g |
| Healthy Fats | 0g |
| Calories | 10 |
How to Serve Easy Dill Pickles for Canning
These dill pickles shine in various scenarios:
- Perfect alongside sandwiches or burgers.
- Add to a cheese platter for an appetizer.
- Pair with potato salad for a refreshing contrast.
- Use as a topping on tacos or nachos.
- Include in lunch boxes for a tangy crunch.
Best Occasions for This Recipe
Enjoy these pickles for a variety of occasions such as:
- Weeknight dinners to spice up meals.
- Holiday gatherings for a festive crunch.
- Meal prep for healthy additions to lunches.
- Family gatherings where everyone loves a good snack.
- Potlucks as a unique homemade contribution.
Make Ahead & Storage
Can This Be Meal Prepped
This recipe is ideal for meal prepping, allowing you to enjoy homemade pickles throughout the season. The pickles develop more flavor over time, so making them ahead is perfect.
Storing Leftovers
Store the pickles in a cool, dark place. Refrigerate for up to 2-3 weeks once opened.
Freezing
Freezing is not recommended for pickles as it can alter the texture.
Reheating
No reheating necessary, as these are enjoyed straight from the jar!
Creative Ways to Use Leftovers
Leftover pickles can enhance your meals in various ways:
- Add to wraps for extra crunch and flavor.
- Include in grain bowls for a tangy bite.
- Slice and layer in sandwiches for a flavor boost.
- Use in picnic lunches for a refreshing side.
FAQs
Can I use regular cucumbers for this recipe?
Yes, but pickling cucumbers are recommended for their crunch and flavor.
How long do homemade dill pickles last?
Stored properly, they can last up to 1 year unopened, or 2-3 weeks once opened in the refrigerator.
Can I adjust the vinegar flavor in the recipe?
Absolutely! You can experiment with different types of vinegar for varied flavor profiles.
Are these pickles safe to eat if the seal is broken?
If the seal is broken, refrigerate the pickles and consume within a few days.
How do I know if my pickles have gone bad?
Look for signs like foul smell, or unusual color changes; if in doubt, discard them.
Save This Recipe for Later
If you’re loving this recipe, be sure to save it to your Pinterest boards or bookmark it for easy access later!
Final Thoughts
Making your own dill pickles is not just a fun kitchen project; it brings the enjoyment of crunchy, flavorful snacks into your home. They are an excellent way to preserve the harvest and add a homemade touch to your meals. Try this recipe today and enjoy the fresh taste of summer all year round!
Dill Pickles
Ingredients
Method
- Prepare a very large pot of water and bring it to a boil. Place a canning rack in the pot.
- Wash jars in soapy hot water, then sterilize in boiling water for 5 minutes and let dry.
- Peel the cucumbers if desired and slice them into 1/8 to 1/4-inch thick slices or 4 spears.
- Place one bunch of dill and 1 to 2 halves of garlic cloves in each jar. Pack the cucumber slices or spears firmly, leaving 1/2 inch of headspace at the top.
- Sprinkle 1/8 teaspoon of calcium chloride granules into each half-pint jar.
- In a large saucepan, combine water, vinegar, and pickling salt. Bring to a boil over medium heat, stirring often.
- Pour the boiling vinegar mixture over the cucumbers, leaving a 1-inch headspace at the top of the jar.
- Add the lids and twist on the jar bands until they are fingertip-tight.
- Lower the jars into the boiling water, ensuring there is 1 inch of water above the jars. Boil for 10 minutes for half-pint and pint jars, or 15 minutes for quart jars.
- Carefully remove the jars with the jar lifter and let them cool completely on a clean surface.
- Pickles will be ready to eat in 24 hours but taste even better after 3 days. Store in the refrigerator for up to 2-3 weeks, or in a cool, dark place for up to 1 year.