

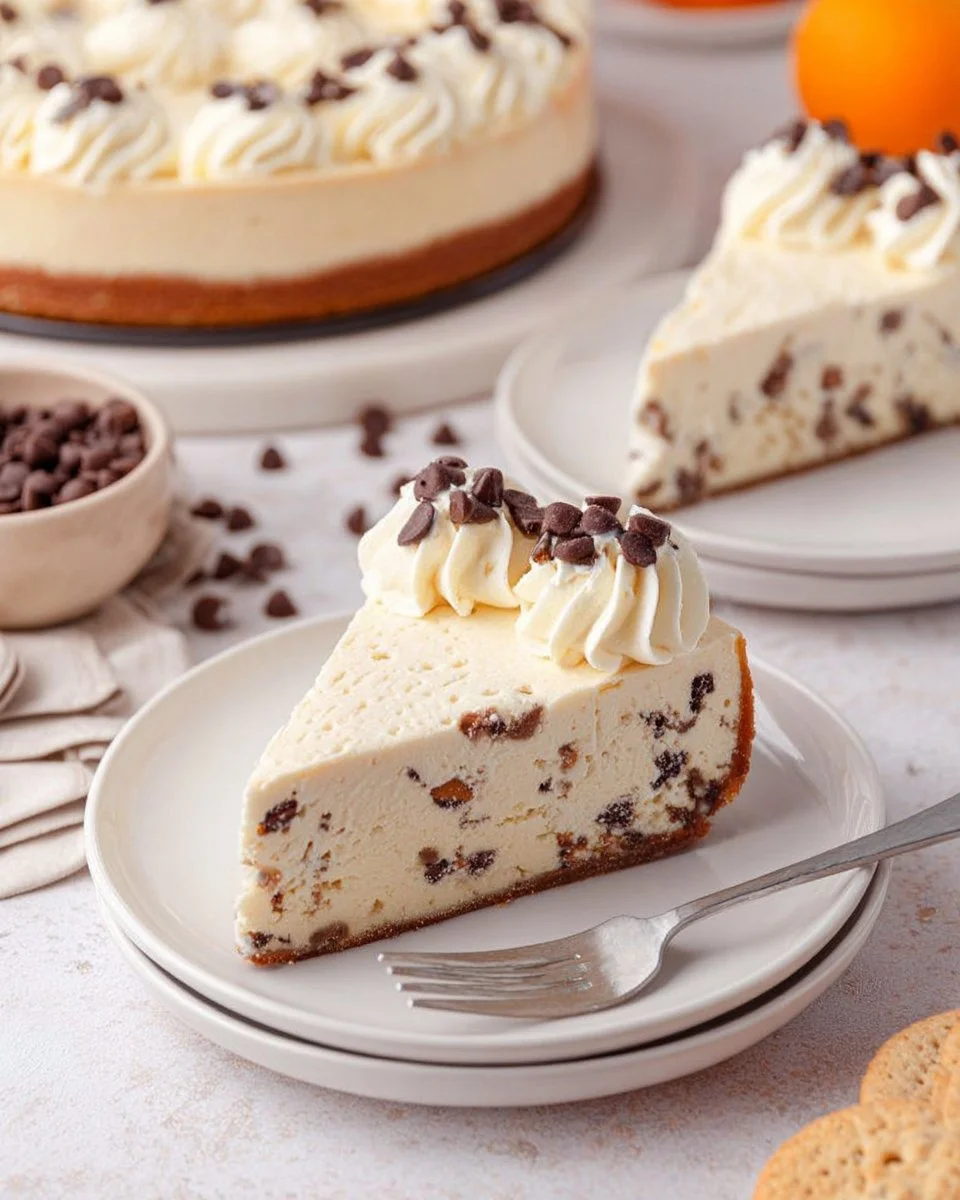
Indulging in a slice of cheesecake can often feel like a luxurious treat, but what if I told you it can also be effortless to make? Picture this: a velvety cake, rich with cream cheese and mascarpone, layered on a crunchy vanilla wafer crust that brings a delightful contrast to each creamy bite. This no-bake iteration offers a refreshing alternative to traditional cheesecakes, perfect for warm days or when you need a quick dessert that still wows your guests.
The combination of sweetened ricotta and a touch of orange zest comes together, evoking classic cannoli flavors that resonate with anyone who loves Italian desserts. With a sprinkle of mini chocolate chips for a touch of decadence, this cheesecake not only meets your sweet cravings but also satisfies the desire for a comforting homemade experience. Easy to prepare and even easier to enjoy, it’s a recipe you’ll want to share.
Quick Answer
This Creamy No-Bake Cannoli Cheesecake is a delightful dessert that combines classic Italian flavors with ease of preparation. It’s rich, creamy, and perfect for any occasion.
Why You’ll Love This Recipe
This dessert isn’t just another cheesecake; it’s an experience! Here’s why you’ll fall in love with it:
- Simple preparation with minimal cooking fuss.
- Rich and creamy texture combining multiple cheeses.
- Classic cannoli flavors with a hint of orange.
- Perfect for warm weather as it requires no baking.
- Great for gatherings or a special family dessert.
- Versatile with easy-to-adapt flavors and toppings.
- Impressive presentation that’s a feast for the eyes.
What Makes This Recipe Special
This Creamy No-Bake Cannoli Cheesecake shines through its unique blend of textures and flavors. The crust made from finely crushed vanilla wafers provides a sturdy, crunchy base that contrasts beautifully with the smooth, creamy filling. The mix of ricotta, cream cheese, and mascarpone creates a luscious mouthfeel, while the carefully selected zest of orange elevates the flavor profile, bringing a bright and refreshing note. This harmonious blend of sweetness and tang in the filling is complemented by the richness of the chocolates, making each bite utterly satisfying.
Kitchen Tools You’ll Need
- Mixing Bowls – necessary for combining the crust and filling ingredients.
- Electric Mixer – ideal for achieving a smooth and creamy filling.
- 9-inch Springform Pan – perfect for easy removal and presentation of the cheesecake.
- Spatula – useful for spreading the filling evenly and scraping bowls.
- Measuring Cups – ensures perfect proportions for your ingredients.
- Zester – for finely grating orange zest for flavor enhancement.
Ingredients
- finely crushed vanilla wafers: Provides a crunchy, sweet base that perfectly balances the creamy filling.
- unsalted butter: Binds the crust together and adds richness.
- granulated sugar: Enhances the sweetness of the crust (optional).
- heavy cream: Imparts a luxurious creaminess, creating a rich texture in the filling.
- whole-milk ricotta: Forms the base of the filling, offering a creamy texture with a subtle flavor.
- cream cheese: Adds tanginess and texture to the cheesecake, balancing the sweetness.
- mascarpone: Contributes to a rich and velvety filling, enhancing the lush mouthfeel.
- confectioners’ sugar: Provides sweetness and helps achieve a smooth texture in the filling.
- zest of medium orange: Adds a radiant citrus flavor that brightens the dessert.
- vanilla extract: Enhances the overall flavor with its warm, aromatic notes.
- almond extract: (optional) Adds depth and a hint of nuttiness to the filling.
- mini chocolate chips: Offers bursts of chocolate flavor throughout the cheesecake.
- sweetened whipped cream: Serves as a light and airy topping that complements the richness.
- chopped pistachios: Provides a crunchy texture and a pop of color for garnish.
- more mini chips: Adds an extra touch of chocolate on top for visual appeal.
Ready to cook? Scroll to the recipe card below for exact measurements.
How to Make Creamy No-Bake Cannoli Cheesecake
Phase 1 – Prep
STEP 1. Make the crust. Combine the crushed vanilla wafers, melted butter, and optional sugar until well mixed.
STEP 2. Press into pan. Firmly press the mixture into the bottom of a 9-inch springform pan to form an even layer.
Phase 2 – Cook
STEP 3. Prepare the filling. In a mixing bowl, beat heavy cream until stiff peaks form.
STEP 4. Mix cheeses. In another bowl, combine ricotta, cream cheese, mascarpone, confectioners’ sugar, orange zest, vanilla, and optional almond extract until smooth.
STEP 5. Combine mixtures. Gently fold the whipped cream into the cheese mixture until fully incorporated.
STEP 6. Add chocolate chips. Stir in mini chocolate chips into the filling before pouring it over the crust.
STEP 7. Chill. Cover and refrigerate for at least 4 hours or until set.
Phase 3 – Serve
STEP 8. Garnish and enjoy. Once set, top with sweetened whipped cream, chopped pistachios, and additional mini chocolate chips before serving.
Why This Recipe Works
The balance of textures in this no-bake cannoli cheesecake is key to its success. The crunchy crust provides a delightful contrast to the ultra-creamy filling, creating a satisfying bite. Layering flavors is another essential element; the combination of ricotta, cream cheese, and mascarpone results in a deliciously rich base that’s complemented by the citrusy orange zest. The chilling method allows the flavors to meld beautifully without the risk of drying out, leaving you with a cheesecake that’s indulgent yet refreshing.
Pro Tips
To ensure your cheesecake turns out perfectly, consider these pro tips:
1. Use well-drained ricotta for a smoother texture in your filling. You can use cheesecloth if needed.
2. Allow your cream cheese and mascarpone to reach room temperature before mixing for easier blending.
3. Don’t skip the chilling time; this is crucial for allowing the cheesecake to set properly.
4. If you prefer a thicker filling, you can increase the amount of cream cheese.
5. Experiment with different flavored extracts or add spices like cinnamon for a delightful twist.
Common Mistakes to Avoid
Mistake: Using un-drained ricotta.
Why it happens: Fresh ricotta contains moisture that can make the filling runny.
How to fix it: Ensure you drain ricotta for several hours prior to mixing.
Mistake: Overwhipping the cream.
Why it happens: Whipping too long can lead to a grainy texture and may even turn into butter.
How to fix it: Stop whipping as soon as stiff peaks form.
Mistake: Not allowing the cheesecake to set long enough.
Why it happens: This leads to a soft texture that won’t hold up during slicing.
How to fix it: Chill for at least four hours, or overnight for best results.
Mistake: Skipping the crust preparation.
Why it happens: Some may think pre-baking is needed for a crust.
How to fix it: This no-bake cheesecake relies on refrigeration to set the crust.
Variations
- Add fresh fruit like berries or banana slices for extra flavor.
- Substitute vanilla wafers with graham crackers for a different crust experience.
- Try a different citrus zest, like lemon or lime, for a distinctive twist.
- Incorporate flavored chocolate, such as dark or white chocolate chips, for added richness.
- Use flavored whipped cream for an extra layer of taste on top.
Nutrition Highlights
| Nutrient | Role |
|---|---|
| Protein | Helps support satiety and balanced meals. |
Serving Ideas
This cheesecake makes an excellent centerpiece for any dessert table and pairs well with a variety of beverages. Serve it alongside a rich espresso or a light herbal tea for a delightful end to a meal. It can also be a sweet treat at celebrations like birthdays, holidays, and potlucks. Consider offering it with a selection of fresh fruit or a drizzle of chocolate sauce for added flair.
Best Occasions for This Recipe
This no-bake cannoli cheesecake is perfect for gatherings and parties, especially during warmer months. It’s an elegant choice for birthday celebrations, family reunions, or holiday dinners. The ease of preparation means you can whip it up ahead of time, allowing you to spend more time with loved ones rather than in the kitchen!
Meal Prep & Storage
Meal Prep
This cheesecake can be made a day in advance, allowing the flavors to develop while in the fridge. It’s a great option for preparing ahead of family gatherings or last-minute celebrations.
Refrigeration
Store any leftovers covered in the refrigerator for up to four days. It’s best enjoyed chilled, and the flavors will remain vibrant.
Freezing
You can freeze this cheesecake for up to a month. Wrap it tightly in plastic wrap and then aluminum foil to prevent freezer burn.
Reheating
For optimal texture, thaw the cheesecake in the refrigerator. Avoid microwaving as it can alter the texture of the filling.
{5e3e16a0-0182-48a8-8efe-3edcb2817567-1024×546.png}
FAQs
Can I make this cheesecake a day in advance?
Yes, it actually tastes better the next day as the flavors meld together.
What can I use if I don’t have ricotta?
You can blend cottage cheese for a similar texture, but be sure to drain it well.
How should I store leftovers?
Cover and refrigerate for up to four days; it can also be frozen for up to a month.
Is it possible to substitute the cream cheese?
You can use a soft cheese alternative, but it may alter the flavor and texture.
What if I can’t find mini chocolate chips?
You can chop a standard chocolate bar finely as an ideal substitute.
Save This Recipe for Later
Don’t forget to pin this recipe to your favorite Pinterest board so you can easily come back to it whenever you’re in the mood for a delicious dessert!
Conclusion
This Creamy No-Bake Cannoli Cheesecake is a testament to the art of easy yet impressive desserts. With its luscious filling and delightful crust, it caters to both your sweet tooth and your love for flavor. Whether for a special occasion or a casual family treat, this cheesecake will leave everyone asking for seconds!

Creamy No-Bake Cannoli Cheesecake
Ingredients
Method
- Combine the crushed vanilla wafers, melted butter, and optional sugar until well mixed.
- Firmly press the mixture into the bottom of a 9-inch springform pan to form an even layer.
- In a mixing bowl, beat the heavy cream until stiff peaks form.
- In another bowl, combine ricotta, cream cheese, mascarpone, confectioners’ sugar, orange zest, vanilla, and optional almond extract until smooth.
- Gently fold the whipped cream into the cheese mixture until fully incorporated.
- Stir in mini chocolate chips into the filling before pouring it over the crust.
- Cover and refrigerate for at least 4 hours or until set.
- Once set, top with sweetened whipped cream, chopped pistachios, and additional mini chocolate chips before serving.